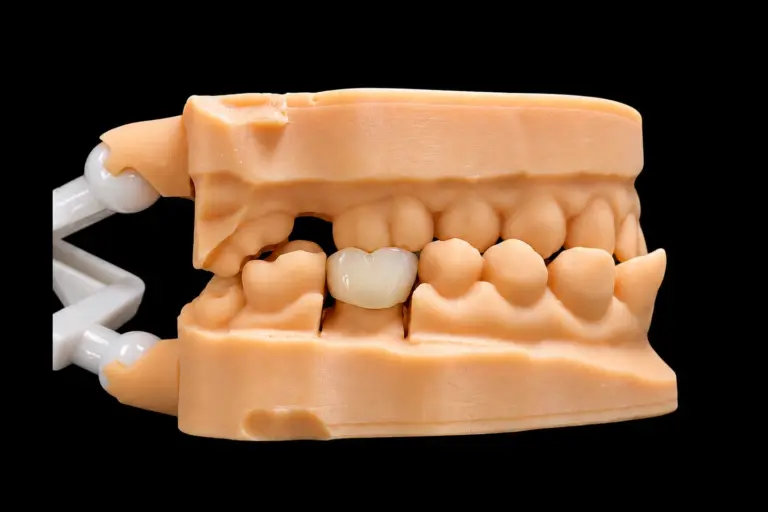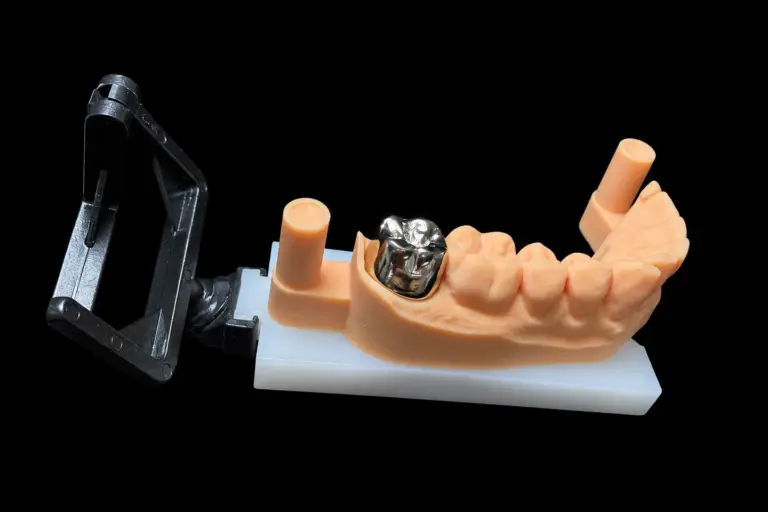
Cementing PFM crowns is about as forgiving as cementation gets. On a retentive prep, a resin-modified glass ionomer (RMGI) or a glass ionomer holds a metal-ceramic crown well. Save resin cement, with a metal primer on an air-abraded intaglio, for preps that are short, over-tapered or over-reduced.
Forgiving isn’t the same as automatic. Most problems with PFM crowns start before the cement is mixed or show up during cleanup, and the metal coping changes several rules you may be used to from all-ceramic work. Product times below come from the manufacturers’ instructions for use (IFUs). When an IFU disagrees with anything here, follow the IFU for the product on your tray.
What the Metal Coping Changes
A PFM crown is a cast or milled metal coping with opaque and layered porcelain on top. The cement only ever touches the metal (plus the porcelain itself, if the crown has a porcelain butt margin). That one fact explains most of the protocol.
Light doesn’t reach the cement Curing light can’t pass through metal, so the cement under the crown sets by its own chemistry. Light-cure-only cements are out. With dual-cure resins and light-curable RMGIs, the light only reaches the margins: a tack cure makes cleanup easier, but the bulk of the cement still self-cures.
The intaglio is an alloy, not a ceramic There’s no hydrofluoric acid and no silane on a PFM intaglio. A conventional cement needs a clean surface. A resin cement needs air abrasion and a primer that matches the alloy (more on that below).
Shade is set by the crown, not the cement The coping and opaque layer block the stump and the cement. A dark tooth or a metal post won’t show through, so cement shade isn’t a decision on a PFM. The exception is a porcelain butt margin, where a thin band of cement can show at the margin.
RMGI suits it well 3M lists PFM crowns and bridges among the indications for RelyX Luting Plus, its RMGI. Some laboratory work has linked RMGI water uptake to cracking under certain all-ceramic crowns. A metal coping doesn’t carry that concern.
It can come back off A crown on a conventional cement is more likely to come off in one piece if you ever need it to, for example to treat the tooth or to replace a bridge abutment. A crown bonded with adhesive resin usually has to be cut off.
This is also why PFM cementation differs from zirconia and e.max . With lithium disilicate, the resin layer also supports the ceramic, so thickness enters the decision. With PFM, the metal carries the load, and the cement decision is mostly about retention.
Before Cementing a PFM Crown: Get the Fit Right First
Cement can’t correct a crown that doesn’t fit, and once it’s mixed, the clock is running. Do every check and adjustment at try-in.
1. Seat it and find out why if it won’t go Check the margins first, then the proximal contacts, then the prep itself. A tight contact can hold a crown up just as surely as a bulky intaglio. A fit-checking material shows internal binding; clean all of it out before you cement.
2. Correct contacts, then the bite Adjust occlusion only once the crown is fully seated and the contacts are right. Check centric and excursions.
3. Finish what you adjusted Adjusted porcelain should be polished, or reglazed if the adjustment was large, before cementation. Once the crown is cemented, reglazing is off the table. If an occlusal adjustment exposes metal through the porcelain, the porcelain there was too thin. Stop and contact the lab rather than cementing it.
Some problems aren’t chairside problems. A crown that won’t seat, an open margin or cracked porcelain should go back to the lab. A slightly high spot is fine to adjust at the chair. The line is simple: if fixing it would change the coping, the margin, the seating or the retention, it’s a remake.
From the bench: Before a PFM crown ships, we check the margins, the intaglio, seating, contacts and occlusion on the model against your Rx, and we check contacts, occlusion and margins again after glazing, because firing can move things. The goal is a crown that needs little more than a quick bite check at try-in.
PFM Crown Cementation: Conventional by Default, Resin When Retention Is Short
For most PFM crown cementation, the prep decides the route, not the material. A common reference for a retentive full-crown prep is the review by Goodacre and colleagues: 10–20° total occlusal convergence and at least 4 mm of axial height on molars and 3 mm on other teeth. If you’re planning the prep itself, our guide to occlusal reduction for PFM crowns covers clearance and how to check it.
Retentive prep: conventional cement RMGI, glass ionomer or zinc phosphate. Retention comes from the prep’s walls; the cement fills the gap and seals it.
Borderline prep: self-adhesive resin More retention than a water-based cement, without separate tooth etching or adhesive. It still needs a dry field and a treated metal intaglio.
Short, tapered or over-reduced prep: adhesive resin Adhesive resin with a tooth adhesive and a metal primer adds retention the prep can’t provide. It’s the most technique-sensitive route and needs reliable isolation.
Most dentists already work this way. In a National Dental Practice-Based Research Network study of 3,468 single crowns, only 13.8% of the 857 PFM crowns went in with a resin cement (self-adhesive included). That was the lowest share of any crown material, alongside full-metal crowns. RMGI was the most-used cement overall, at 52.2% of all crowns.
The same study shows where resin cement actually got used. Crowns whose occlusal reduction was judged excessive were significantly more likely to be bonded (p=.02). Excess taper pushed in the same direction but wasn’t statistically significant (p=.15).
The lab technicians who made the crowns did the assessing, and the authors suggest that labs flag short or over-tapered preps so the dentist can choose the cement with that in mind. If you’re unsure how much retention a prep has, note it on the Rx and ask us how it looks on the die.
Conventional cement has a solid track record on metal-ceramic crowns:
- In a split-mouth randomized trial of metal-ceramic and alumina-core crowns, RMGI was at least as good as zinc phosphate over 102 months. Estimated survival without recementation or loss of vitality was 97% for RMGI and 95% for zinc phosphate, with no significant difference.
- In a laboratory study of metal-ceramic copings, every cement tested retained the castings at least as well as zinc phosphate. Powder/liquid versions were more retentive than some paste/paste versions, so they’re worth the extra mixing when retention is a concern.
- For self-adhesive resin, a prospective multicenter study of 152 metal-ceramic crowns recorded three debonds and 97.6% survival over follow-up of up to six years.
None of these studies show that bonding a well-retained PFM crown makes it last longer. Resin cement earns its place when the prep needs help.
Cement for PFM Crowns: How Each Class Works
Brand names don’t tell you the class, and the same brand can cover several. RelyX Luting Plus is an RMGI, RelyX Unicem 2 is a self-adhesive resin, and RelyX Ultimate is an adhesive resin cement. Name the product, not just the brand, when you plan the case. Choosing a cement for PFM crowns really means choosing a class:
| Class | Examples | What holds the crown | Where it fits on PFM | Excess cleanup | Later removal |
|---|---|---|---|---|---|
| Zinc phosphate | Powder/liquid zinc phosphate | Mechanical only; no chemical bond | Retentive preps; longest clinical history | After it sets, in pieces | Easiest |
| Glass ionomer | GC Fuji I, Ketac Cem | Prep retention plus a chemical bond to tooth | Retentive preps | After it reaches a rubbery set | Usually intact |
| RMGI | RelyX Luting Plus, GC FujiCEM 2 | Prep retention plus a chemical bond to tooth | Retentive preps; the everyday choice | Gel stage, or after a short tack cure | Usually intact |
| Self-adhesive resin | RelyX Unicem 2, RelyX Universal, SpeedCEM Plus | Prep retention plus a partial resin bond to tooth and treated metal | Borderline retention | Tack cure or gel stage, per IFU | Harder |
| Adhesive resin | Panavia V5, Multilink Automix, RelyX Ultimate | Bond to conditioned tooth and primed metal | Short, tapered or over-reduced preps | Tack cure or gel stage, per IFU | Usually sectioned |
A few points the table can’t hold:
- Zinc phosphate is acidic when first mixed. On a deep prep over a vital pulp, that’s a reason to choose another class or follow the IFU’s liner guidance.
- Glass ionomer dislikes both extremes of moisture. Leave the dentin slightly moist rather than desiccated, and keep the margins dry until it sets.
- RMGI handles early moisture better than glass ionomer and is easier to clean up. Among the water-based cements in the PBRN study, 84% of crowns went in with RMGI.
- Zinc polycarboxylate still works on a retentive metal or PFM crown, but it’s seldom the first pick today.
Preparing the Intaglio and the Tooth
The metal intaglio
Our PFM crowns leave the lab with the intaglio air-abraded and cleaned. For a conventional cement, that’s all the conditioning it needs: keep it clean and dry it before loading.
For a resin cement, the try-in has contaminated the metal with saliva, so condition it again just before cementing. Follow your cement or primer IFU for particle size and pressure; they differ between systems. The RelyX Unicem 2 IFU, for example, calls for aluminum oxide of 40 µm or finer, then cleaning with alcohol and drying with oil-free, water-free air. With a porcelain butt margin, keep the blasting off the porcelain.
Then prime for the alloy, because base and noble metals bond through different chemistry:
Base-metal alloys (cobalt-chrome) Phosphate monomers such as MDP bond to the oxide layer on base metals. An MDP-containing primer, or a cement system that relies on MDP, does the job.
Noble alloys (gold, palladium-silver, platinum) Noble metals form little or no stable oxide for MDP to grip. They need a primer with a sulfur-based monomer, such as VBATDT or a sulfide methacrylate.
Some primers cover both. Kuraray’s Alloy Primer combines VBATDT for precious alloys with MDP for non-precious ones. Ivoclar describes Monobond Plus as combining silane, phosphate and sulfide methacrylates, the last one for precious alloys, in its guidance on pretreating restorations.
That makes the alloy worth knowing before you bond. We work in cobalt-chrome, palladium-silver, gold and platinum alloys. Specify one on the Rx, or ask us which alloy a crown was made in, and we can supply its composition documentation.
The tooth
- Remove the provisional and every trace of temporary cement. Leftover temporary cement can keep the crown from seating fully. Clean the prep with pumice and water.
- Plan the provisional cement around the final one. Eugenol-containing temporary cements can inhibit resin polymerization; the RelyX Unicem 2 IFU recommends a eugenol-free temporary when a resin cement will follow.
- Isolate. Cotton rolls and retraction are usually enough for a conventional cement on a supragingival margin. Resin cements need a dry, uncontaminated field, ideally a rubber dam.
- Treat the tooth for the cement you chose. Water-based and self-adhesive cements need no separate etch or adhesive; don’t add a phosphoric acid etch unless the IFU calls for it. Adhesive resin cements use the tooth adhesive they were designed with.
Seating, Cleanup and the Bite Check
1. Load a thin, even layer Coat the inside of the crown, not the prep, and keep the layer thin. With an automix syringe, discard the first bit of paste before loading. Water-based cements are held to an ISO film-thickness limit of 25 µm, and in one comparison of luting cements, most products met it for up to two minutes after mixing. A thick or late mix is one reason a crown stops short.
2. Seat and hold Seat along the path of insertion with firm, steady pressure, and hold it until the initial set. Cement squeezing out at the margin doesn’t prove the crown is seated; look at the margin itself.
3. Remove excess at the right stage Timing depends on the class. Glass ionomer comes off once it has a rubbery set. RMGI and resin cements come off at the gel stage, which you can reach with a short tack cure on the margins. The RelyX Luting Plus technical data sheet, for example, allows a five-second light cure per surface and cleanup right after. Too early and you pull cement out of the margin; too late and it’s a chisel job.
4. Clean the contacts the right way Pass floss through the contact, then pull it out to the side instead of back up through the contact, which can lift a crown that hasn’t set. This is the method in the Foundation for Oral Rehabilitation’s cementation lecture. Run an explorer around the margin and through the sulcus for remnants.
5. Check the bite once it’s set Recheck centric, lateral and protrusive contacts and the proximal contacts. Polish anything you adjust. A high spot, residual cement or an open margin is easier to deal with now than at the next appointment.
Let the patient know that mild, short-lived sensitivity or gum tenderness can happen, and that a bite that feels high, a crown that feels loose, or pain that persists or gets worse is a reason to call.
Bridges, Implant Crowns and Temporary Cementation
PFM bridges
Several abutments mean more working time used before the bridge is seated. Choose a cement with enough working time for the span and have everything ready before mixing. After seating, clear cement from under the pontic and around the connectors with a floss threader or superfloss, and check every retainer margin. Metal connectors are a big part of why PFM crowns and bridges remain a strong choice for longer posterior spans.
PFM crowns on implant abutments
Residual cement around an implant is harder to see and harder to reach than around a tooth. Use a small amount, keep the margin as shallow as the tissue allows, and check the sulcus carefully. Where the screw channel position allows it, we generally recommend screw retention for implant restorations .
Temporary cementation
Unlike a pressed e.max crown, a PFM crown can be seated with temporary cement for a trial period, for example to watch the bite on an extensive case. Keep the trial short, use a eugenol-free temporary cement if you’ll finish with resin, and clean the intaglio and the tooth completely before the final cementation.
When a PFM Crown Comes Off
Start with where the cement stayed:
Cement left inside the crown, tooth mostly bare The tooth side failed. Usual causes are too little retention for the cement used, contamination at seating, or a cement that dissolved at the margin.
Cement left on the tooth, intaglio mostly clean The crown side failed. Usual causes are a contaminated intaglio, a resin cement without the right metal primer, or residue from a fit checker or temporary cement.
Before you recement, check the tooth for recurrent caries and fracture, and the crown for fit, margins and porcelain damage. If the crown is intact and seats completely, remove all old cement from both surfaces. Air-abrade the intaglio to clean it, then recement. If the first cement was a water-based one on a marginal prep, switch to resin with the metal primer for the alloy so you fix the cause, not just the symptom.
If it comes off again, or it no longer seats, has open margins or cracked porcelain, it needs a new crown. Recurrent caries means new preparation and a new impression or scan. When a crown goes back to the lab, what we need depends on the reason: a crown that fit but cracked can often be remade from the original data, while seating, margin or bite problems need a new scan, model or impression.
Removing a PFM crown. On a conventional cement, a crown remover is worth trying first, with care on teeth that may not withstand the force. To section it, cut through the porcelain with a diamond down to the metal, switch to a carbide bur made for cutting metal to go through the coping, section from margin to margin, then separate the halves. Diamonds skip on metal, and carbide chips porcelain, so use each where it cuts best.
Working With Istar Digital on PFM Crowns
Your choice of alloy Cobalt-chrome, palladium-silver, gold or platinum alloys, with composition documentation on request. Porcelain butt margins are available where you don’t want a metal collar.
Covered after delivery A crown that won’t seat, has open margins or contacts, or comes back with a high bite or the wrong shade is ours to adjust or remake at no charge. Crowns and bridges carry a 3-year warranty, and we pay return shipping on remakes. See our remake and warranty policy .
Our own labs Four labs in Shenzhen and Huizhou, China, with no outsourcing. FDA-registered establishment, Registration No. 3039441248.
Three Rx notes that make cementation day easier: the alloy you want, or that you’d like the alloy documentation; whether an anterior crown should have a porcelain margin; and any prep you suspect is short or tapered, so we can tell you how it looks on the die.
Single trial cases are welcome. Send a PFM test case and see how it seats at your next delivery appointment.
FAQ
What does MPa mean, and should I pick the strongest cement?
MPa (megapascal) is a unit of stress: one newton per square millimeter. Cement brochures quote compressive or bond strengths in MPa from lab tests, but test methods differ, so numbers from different products often aren’t comparable. On a retentive PFM prep, the geometry does most of the holding. Cement strength starts to matter when the prep is weak, and that’s when to move to resin.
Are PFM crowns still worth using?
For the right case, yes. A systematic review by Sailer and colleagues estimated 5-year survival of 94.7% for metal-ceramic single crowns, close to the 96.6% for reinforced glass-ceramic crowns. PFM remains a good fit for heavily loaded posterior teeth, bridges, dark or metal-post abutments, and cases where cost matters more than maximum esthetics.
Do the same rules apply to full-metal crowns?
Yes. A full-cast crown has the same alloy intaglio, so the cement classes, the metal primers and the cleanup timing are the same. Without porcelain, try-in adjustments only need polishing, never reglazing.
Does microleakage differ between conventional cements on metal?
Not by much in lab testing. In one in vitro study of metal copings, zinc phosphate, glass ionomer and RMGI showed statistically similar marginal leakage, though the authors note that lab tests can’t reproduce every condition in the mouth. Fit and cleanup make more difference than the choice among these three.