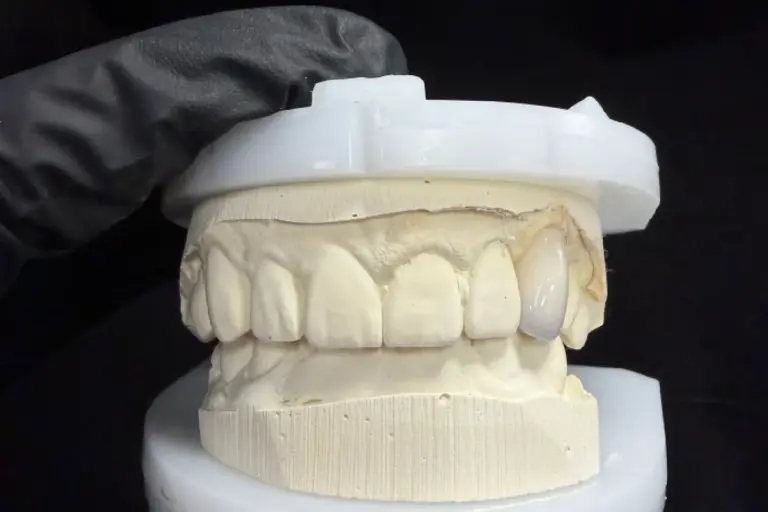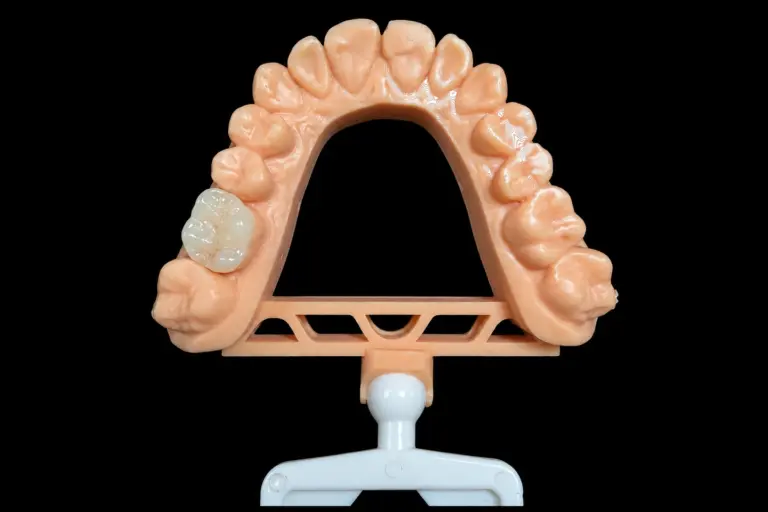
Cementing emax crowns comes down to one decision you make before you open a syringe: does this crown need a true adhesive bond, or can it be luted? A full-coverage lithium disilicate crown with enough ceramic thickness on a retentive prep can go in with a self-adhesive resin or a conventional cement. If any one of those three conditions is missing, bond it.
Everything below follows from that rule: how to check each condition, how to prepare the intaglio, which cements belong in which class, and what to do when a crown comes off. Product times come from the manufacturers’ instructions for use (IFUs), and they differ between systems. When an IFU disagrees with anything here, the IFU for the products on your tray wins.
Luting and Bonding Are Two Different Ways to Hold a Crown
Luting relies on the prep. The cement fills the gap between crown and tooth, and retention comes mostly from friction between near-parallel walls. Bonding builds a chemical and micromechanical link on both sides: etched and silanated ceramic on one, conditioned enamel and dentin on the other, with an adhesive resin cement in between.
The two get mixed up all the time, and the mix-up shows when crowns keep coming off. A crown luted onto a short, tapered prep hasn’t “debonded.” It was never bonded, so the cement had nothing to hold it but a prep that couldn’t.
Self-adhesive resin cements sit in between. They skip the separate tooth adhesive and form a partial bond to tooth structure, but they still need a retentive prep. Ivoclar’s IPS e.max Press instructions make the difference explicit: adhesive cementation raises the overall strength of the seated restoration, while self-adhesive and conventional cementation don’t.
That last point is why e.max is less forgiving than zirconia. For a zirconia crown, the cement choice is mostly about retention. Lithium disilicate is a glass ceramic, and a thin glass ceramic leans on the resin layer for support, so ceramic thickness becomes part of the cement decision.
Cementing Emax Crowns Starts With Three Checks
Run these before the try-in. If all three pass, you can choose between bonding and luting. If any one fails, bond.
1. What kind of restoration is it? Ivoclar lists adhesive, self-adhesive or conventional cementation as options only for anterior and posterior crowns and for three-unit bridges up to the second premolar. Minimally invasive crowns, inlays, onlays, partial crowns and veneers must be bonded.
2. Is the ceramic thick enough? For a monolithic IPS e.max Press crown, Ivoclar’s minimums are 1.5 mm incisal and 1.2 mm circular on anterior teeth, and 1.5 mm occlusal and circular on posterior teeth. A minimally invasive crown can go down to 1.0 mm, but only with adhesive cementation.
3. Is the prep retentive? For self-adhesive cementation, Ivoclar recommends a preparation angle of about 4–8° and a preparation height of at least 4 mm. Conventional cementation needs the same 4–8° angle and sufficient height.
One question sits above all three: should this tooth get e.max at all? Ivoclar lists bruxism as a contraindication for IPS e.max Press. For a heavy grinder, the fix is usually a different material, such as zirconia , not a different cement.
A popular shortcut says any e.max crown 1.5 mm or thicker can be luted with anything. It drops the prep condition, and that’s the half that keeps the crown on. Thickness protects the ceramic; it doesn’t add retention.
Measure thickness with ceramic calipers at the thinnest point of the facial wall, which is where Ivoclar measures crowns. For retention, the classic complete-crown preparation review by Goodacre and colleagues gives a useful frame: 10–20° total occlusal convergence, at least 4 mm occlusocervical height on molars and 3 mm on other teeth, and an occlusocervical-to-faciolingual ratio of at least 0.4. Total convergence across the prep and the angle of each wall are different measurements, so compare like with like.
From the bench: Ceramic thickness is set at the design stage, not at the chair. When a prep leaves too little room or the wall thickness is at risk, we send the design for your approval before anything is pressed. If you know clearance is tight, note the remaining space on the Rx so we can plan the material and design with you.
Emax Crown Cementation: Two Routes Side by Side
Once the three checks are done, emax crown cementation follows one of two routes.
Bond it
- When: minimally invasive crown, short or over-tapered prep, or ceramic below the full-crown minimums. Always an option for any e.max crown.
- Intaglio: HF etch and silane, every time.
- Tooth: etch and adhesive per your bonding system.
- Cement: adhesive resin cement, dual-cure for most crowns.
- Isolation: rubber dam where feasible.
- Later removal: usually means sectioning.
Lute it
- When: full crown, full thickness and a retentive prep, all three.
- Intaglio: HF etch and silane for a self-adhesive resin; follow the cement’s IFU for a glass ionomer.
- Tooth: clean, no separate adhesive.
- Cement: self-adhesive resin or conventional glass ionomer.
- Isolation: a dry field is still required.
- Later removal: a crown on glass ionomer is more likely to come off intact.
Prepare the Intaglio: Etch, Silane, and No Blasting
Lithium disilicate bonds through its glass phase. Hydrofluoric acid dissolves part of that glass and leaves a micro-retentive surface, and silane couples the silica in the ceramic to the methacrylate in the resin. You need both. An MDP primer is the zirconia chemistry and doesn’t replace silane on etched e.max.
Ivoclar’s protocol for IPS e.max is 5% HF for 20 seconds, followed by thorough rinsing and drying. Then apply Monobond Plus and let it react for 60 seconds before dispersing it with air. That 60 seconds is reaction time, not a working window. Monobond Etch & Prime is a one-step alternative: scrub for 20 seconds, let it react for another 40, rinse and dry. Use it instead of HF and silane, not on top of them.
Keep to 20 seconds. Longer etching doesn’t build a better bond; it removes more glass. A systematic review of in vitro studies found that HF treatment can reduce the strength of glass ceramics, with results varying by concentration and time. Times from other systems or other ceramics don’t transfer: feldspathic porcelain takes a longer etch, and that time would over-etch e.max.
Don’t air-abrade the e.max intaglio. Ivoclar’s cementation protocol for its glass ceramics has no blasting step, and alumina abrasion can weaken lithium disilicate.
A universal adhesive with silane in the bottle isn’t a reliable substitute for a separate silane step. In a lab study on lithium disilicate, the most durable bond after a year of water storage came from a separate silane followed by a universal adhesive; using only one of the two held up less well.
The intaglio steps apply to self-adhesive cements too. Self-adhesive means no separate adhesive on the tooth; it says nothing about the ceramic. Ivoclar pairs SpeedCEM Plus with etching and Monobond Plus on e.max, and the RelyX Unicem 2 instructions call for HF etching and silane on etchable glass ceramics. Conventional glass ionomer is the exception: Ivoclar’s protocol for conventional cementation skips the silane.
Was the Crown Already Etched?
Some labs etch the intaglio before shipping. That changes your steps, because a second etch weakens the ceramic and adds nothing to the bond. Check the crown’s state before you reach for the HF.
Etched, not yet tried in Apply silane and cement.
Etched, then tried in Saliva has contaminated the surface. Clean it, re-apply silane, then cement. Don’t etch again.
Not etched 5% HF for 20 seconds, rinse, dry, then silane.
Not sure Ask the lab before you etch. Guessing either way costs you: etch twice and you weaken the ceramic, skip the etch and the bond is weak.
Ivoclar’s guidance on pretreating restorations before adhesive cementation is to clean a pretreated restoration after try-in rather than etch or blast it again. Its SpeedCEM Plus instructions use Ivoclean for 20 seconds, then rinsing, drying and re-priming with Monobond Plus or Monobond Etch & Prime. Phosphoric acid has also cleaned contaminated lithium disilicate well in laboratory studies; follow the cleaning step your cement system specifies. Keep phosphoric acid away from zirconia, where it contaminates the surface.
Choosing a Cement: What Each Class Actually Does
Brand names don’t tell you the class. RelyX alone covers a resin-modified glass ionomer, a self-adhesive resin and an adhesive resin cement, so name the product when you plan the case. For pressed e.max, our general recommendation is a resin cement, such as Variolink or RelyX Ultimate. Ivoclar’s cementation navigation tool sorts its own products by material and indication.
Adhesive resin cement Examples: Variolink Esthetic DC, Multilink Automix, RelyX Ultimate Bonds to both the conditioned ceramic and the conditioned tooth. Required for minimally invasive crowns, short preps and thin ceramic, and suitable for any e.max crown. It’s the most technique-sensitive class.
Self-adhesive resin cement Examples: SpeedCEM Plus, RelyX Unicem 2, RelyX Universal No separate tooth adhesive, but the intaglio is still etched and silanated. Ivoclar’s SpeedCEM Plus instructions exclude short or severely tapered preps and say not to use it without a dry field.
Resin-modified glass ionomer Examples: RelyX Luting Plus, FujiCEM 2 A conventional-style luting cement that depends on prep retention. Before using one on e.max, check that its IFU lists lithium disilicate crowns. It isn’t a bonding cement.
Conventional glass ionomer Example: Vivaglass CEM Ivoclar’s conventional option for eligible e.max crowns and bridges. Retention comes entirely from the prep, so it fits only the full-crown, full-thickness, retentive case.
Light-cure or dual-cure? Most crowns are too thick for light-cure cement alone. The Variolink Esthetic LC instructions limit light-cure cementation to translucent restorations under 2 mm and rule it out for opaque ones. For crowns, use a dual-cure or self-cure cement. Light-cure cement belongs with thin veneers .
Bonding Emax Crowns, Step by Step
This is the adhesive route, which you’ll use when bonding emax crowns that are thin or sit on short preps. For the luting route, the notes in italics show what changes.
- Remove the provisional and clean the prep. Use an oil- and fluoride-free pumice paste. Eugenol-containing temporary cements can inhibit resin polymerization, so use eugenol-free materials during the provisional phase.
- Try in. Check fit, margins and contacts. Use the try-in paste that matches your cement. Leave occlusal adjustment until after cementation; the RelyX Unicem 2 instructions advise this for glass ceramics because an unseated crown can fracture under load.
- Isolate. A rubber dam where feasible. Moisture control is one of the main factors in predictable adhesive bonding. Luting route: you still need a dry field.
- Condition the intaglio according to its state, using the cards above. Luting route: the same for a self-adhesive resin; follow the cement IFU for glass ionomer.
- Condition the tooth with the adhesive system your cement is designed for, and check that the adhesive is compatible with a dual-cure cement. Don’t over-dry dentin. Luting route: clean, rinse and leave the dentin slightly moist; no adhesive.
- Seat and hold. Apply steady pressure until the crown is fully seated.
- Remove excess at the right moment. Tack-cure briefly or wait for the gel phase, then remove excess with a scaler and floss. The RelyX Unicem 2 instructions, for example, give about 2 seconds of light or the gel phase starting about 3 minutes after mixing. Cover the margins with glycerin gel so the cement line cures fully.
- Final cure and finish. Cure from every surface for the time your cement specifies. Then check the sulcus for leftover cement, adjust the occlusion and polish.
If you do adjust a glazed surface, polish it back with a system made for lithium disilicate, such as Sof-Lex or a comparable ceramic polishing kit.
Shade: Plan It Before You Reach for the Cement
The final color of an e.max crown is the sum of the prep shade, the ceramic’s thickness and translucency, and, to a smaller extent, the cement. Ivoclar’s own guidance is that cement shade has only a minimal effect on the overall result, which is why the lab’s choice of ingot translucency matters so much.
The research points the same way. In one study on lithium disilicate crowns, substrate, ceramic thickness, translucency and cement all affected the final color, while the try-in paste had the weakest effect. Another found no significant effect from cement shade or cement thickness on 1.5 mm crowns under its test conditions. An opaque cement won’t reliably hide a dark stump under a full-thickness crown; the masking has to be built into the crown.
From the bench: For anterior crowns, send a photo of the prepared tooth with a shade tab next to it, along with the usual photo of the neighboring teeth. We use the stump shade to decide how much masking the crown needs. Shoot with a camera and neutral lighting rather than a phone with filters, which shift color.
When an Emax Crown Comes Off
Start with the crown in your hand and look at where the cement stayed.
Cement stuck to the tooth, intaglio clean The ceramic side failed. Usual causes: the intaglio wasn’t etched or silanated, or it was contaminated after conditioning.
Cement inside the crown, tooth bare The tooth side failed. Usual causes: too little retention for a luting cement, a weak tooth-side bond, or contamination during seating.
Before you recement, check the tooth for caries and fracture, and the crown for cracks, fit and margin integrity. If the crown is intact and seats well:
- Remove the old cement from the tooth and clean it.
- Remove the cement from the intaglio carefully, without air abrasion.
- Clean the intaglio, then re-condition it with a compatible method. Monobond Etch & Prime avoids a second full HF etch on ceramic that was already etched once.
- Bond it. If the first failure came from a luting cement on a marginal prep, switching to the adhesive route addresses the cause.
If it comes off a second time, or the crown is cracked, doesn’t seat or has open margins, the answer is a new crown, not more cement. A cracked crown that fit well can often be remade from the original data; fit or margin problems need a new scan or impression.
Removing a bonded crown usually means cutting it off. The Compendium review on removing modern ceramics recommends a coarse diamond with light pressure and copious water, sectioning buccolingually down to the cement, then separating the pieces. Crown removers risk fracturing the tooth, especially when the crown is bonded to enamel. Erbium lasers can debond many ceramic crowns intact; a retrospective clinical analysis reports on their effectiveness and practical limits.
Working With Istar Digital on E.max Crowns
Pressed, not milled Our e.max crowns are IPS e.max Press, for anterior and posterior crowns and for three-unit bridges up to the second premolar.
Checked on the model Before shipping, we check margins, the intaglio, seating, contacts and occlusion against the approved Rx and design.
Covered after delivery Crowns and bridges carry a 3-year warranty, and we pay return shipping on remakes. See our remake and warranty policy .
Registered and on schedule FDA-registered establishment, Registration No. 3039441248. Routine crown and bridge cases take 2–3 working days in the lab.
Single trial cases are welcome. Send an e.max crown test case and see how it seats on your next appointment.
FAQ
Can I temporarily cement an e.max crown?
No. Ivoclar lists temporary seating of IPS e.max Press restorations as a contraindication. If you need a trial period, do it with a provisional, and cement the definitive crown once.
Should I seal the dentin at the prep appointment?
It’s worth considering when a lot of dentin is exposed or when there’s a long provisional phase. A meta-analysis of clinical studies found fewer complications and less postoperative sensitivity with immediate dentin sealing. A separate review concluded that it should be treated as an elective step, mainly for patients and preps at higher risk of sensitivity.
Does bonding make an e.max crown last longer?
Not on every crown. A systematic review of cement type covering 17 studies and 2,436 zirconia and lithium disilicate crowns found comparable survival and complication patterns with adhesive and conventional cementation, though the evidence was of poor quality. On a retentive, full-thickness crown, both routes can succeed. On a thin crown or a short prep, bonding isn’t optional.
Can I lute an e.max bridge?
Ivoclar allows adhesive, self-adhesive or conventional cementation for three-unit IPS e.max Press bridges up to the second premolar, provided both abutments are retentive. The same intaglio rules apply to each retainer. For the bridge itself, connector size is the limiting factor, so design comes before cement.
Can e.max crowns be cemented on implant abutments?
IPS e.max Press is indicated for single-tooth implant superstructures, but not as a minimally invasive crown on an implant. When you cement on an abutment, check the sulcus carefully for residual cement after cleanup; it’s harder to see and harder to reach than around a natural tooth.