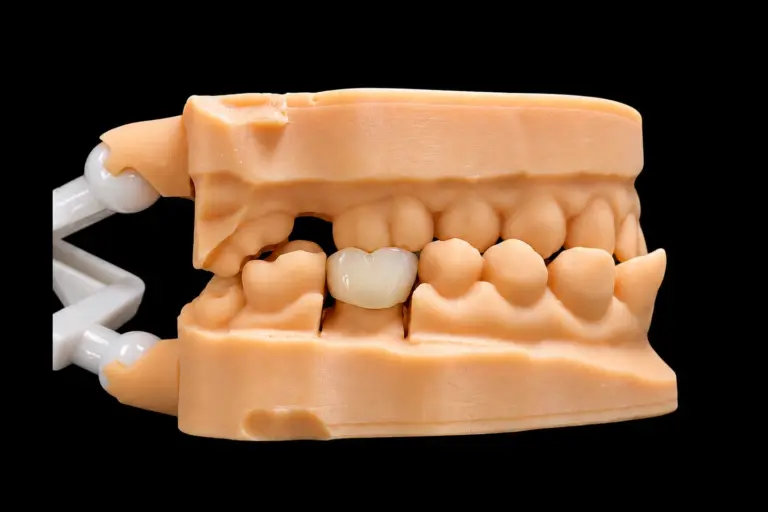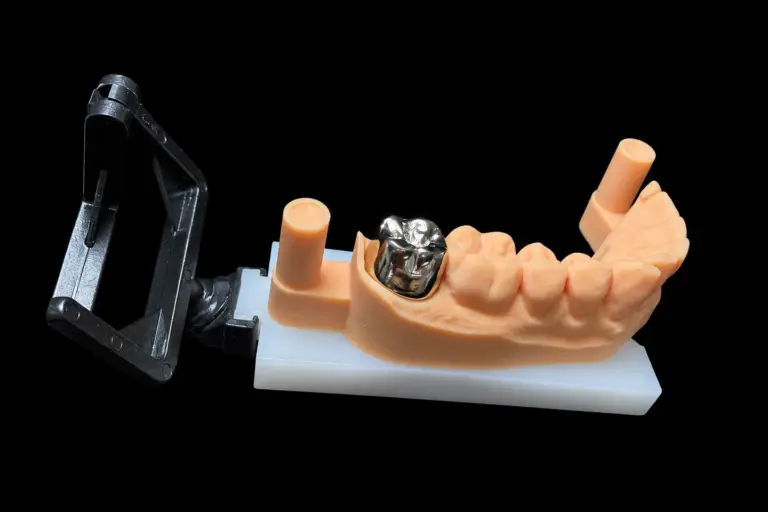
For occlusal reduction for PFM crown preps on posterior teeth, plan about 2.0 mm over the functional cusps and anywhere a centric contact will sit on porcelain (1.5 mm is the minimum), and 1.0–1.5 mm over the nonfunctional cusps. With a metal occlusal surface, about 1.5 mm on functional cusps and 1.0 mm on nonfunctional cusps is enough. Those numbers only count if you measure them against the opposing teeth, in centric and in excursions, before the scan or impression goes out.
Here’s why a PFM crown needs that much room, why the figures you’ll find don’t always agree, how to cut and check the reduction, and what we do at Istar Digital Dental Lab when the space on the model comes up short.
Why a PFM Crown Needs More Room Than a Metal Crown
A PFM crown is three layers deep wherever porcelain covers the occlusal surface:
- Metal coping, about 0.3–0.5 mm. We check coping thickness with a caliper or thickness gauge.
- Opaque porcelain, about 0.2–0.3 mm. It masks the metal. Without it, the coping shows through as gray.
- Body and enamel porcelain, about 1 mm at the least, to build shade and anatomy.
Stack those and you get roughly 1.5–1.8 mm, which is why 1.5 mm is the floor for porcelain-covered occlusion, not the target. Where the tooth gives less, something has to get thinner. Thin porcelain chips. Thin metal in the grooves can perforate. If the technician keeps every layer at full thickness, the crown comes back high or overcontoured.
The functional cusps and centric contacts carry the bite, so they get the extra half millimeter. At 2.0 mm, the porcelain over a loaded cusp can be built to full thickness on a coping that supports it. A metal occlusal surface needs no opaque or porcelain there, which is why it saves roughly half a millimeter.
From the bench: missing clearance can’t be made up inside the crown. Thinning the porcelain or the coping trades space for strength or shade, and we’d rather you know about that trade before we make it.
Occlusal Reduction for PFM Crown Preps, Cusp by Cusp
The functional cusps are the maxillary palatal and the mandibular buccal cusps. They need the most room and a broad bevel.
| Area | Porcelain occlusal surface | Metal occlusal surface |
|---|---|---|
| Functional cusps (maxillary palatal, mandibular buccal) | 1.5–2.0 mm; aim for 2.0 mm where porcelain carries a centric contact | About 1.5 mm |
| Nonfunctional cusps | 1.0–1.5 mm | About 1.0 mm |
| Central fossa and grooves | Follow the cusp planes; never flatten | Follow the cusp planes; never flatten |
Most dentists already aim for the higher number. In a National Dental Practice-Based Research Network survey of about 1,800 dentists, 66% reported using 2.0 mm of occlusal clearance for a PFM molar, 25% used 1.5 mm and 9% used more than 2 mm.
Why the Published Numbers Don’t Agree
You’ll see 0.7 mm, 1.0 mm, 1.5 mm, 2.0 mm and 2.5 mm all quoted for PFM crown preparation. Most of the time nobody has the math wrong. They’re measuring different things.
| The number you see | What it measures | Typical PFM value | How to use it |
|---|---|---|---|
| Final occlusal clearance | Space between the finished prep and the opposing tooth, in the bite | 1.5–2.0 mm; some guidelines go to 2.5 mm on functional cusps | The number to verify before you scan |
| Depth-groove depth | How deep the orientation cuts go | About 1.0 mm on functional cusps; about 0.7 mm on lingual cusps under metal occlusion, in one teaching protocol | A starting guide, not the final space |
| Material minimum | The thinnest section a manufacturer allows for a given product | Product-specific | A floor for that product, never a prep target |
| One number for the whole tooth | A single PFM figure with no cusp or occlusal material named | Usually 1.5–2.0 mm | Ask which cusp, and whether the occlusal surface is porcelain or metal |
The same logic applies across materials. Monolithic zirconia and lithium disilicate have no coping and no separate porcelain layer, and their minimums depend on the product and, for e.max, on how it’s cemented. Don’t prep a PFM to a zirconia number, and don’t assume a zirconia prep has room for porcelain over metal. If the space on a tooth points toward monolithic zirconia, decide that before you cut.
PFM Crown Preparation: How to Cut the Reduction
1. Decide the Occlusal Material First
Before you start the PFM crown preparation, choose porcelain or metal occlusion and decide where the centric contacts will land. Mark the existing contacts with articulating paper. Switching materials after the prep can leave you with too much reduction or not enough.
2. Make a Putty Index
Take a silicone putty index over the tooth, or over a diagnostic wax-up if you’re changing the form. Later you’ll section it buccolingually and read the reduction directly against the original contour.
3. Place Depth Grooves
In the University of Toronto PFM preparation protocol for a mandibular molar, three orientation grooves about 1 mm deep go into the buccal functional cusp. When the occlusal surface will be metal, the lingual cusp grooves are about 0.7 mm. Groove depth is only where you start: the final occlusal clearance comes after the bevel and the check against the opposing tooth.
4. Follow the Cusp Planes
Connect the grooves along the original cusp inclines and keep the ridges and fossae. A flat occlusal table looks generous but isn’t. The crown still needs a central fossa, so it ends up thinnest over the central groove, with thin porcelain over thin metal.
5. Bevel the Functional Cusp
Finish the occlusal reduction with a broad functional cusp bevel that roughly parallels the opposing cusp inclines. Skip it and the functional cusp, the most heavily loaded point on the crown, becomes its thinnest. Recheck the bevel with the sectioned putty index.
Confirm the Occlusal Clearance Before You Scan
A prep that looks reduced often isn’t. In a 2024 audit of crown preparations in a dental school clinic, more than 47% of mounted preps sent for monolithic zirconia crowns were short of clearance in at least one area. Functional cusps were under-reduced significantly more often than nonfunctional cusps. Those were student preps for zirconia, not PFM, but the lesson carries over to any PFM crown preparation: reduction judged by eye tends to come up short, and the functional cusps come up short first.
- Sectioned putty index. Shows how much tooth you’ve removed compared with the original form. It’s the most direct check of the cusp planes and the bevel.
- Reduction gauges and clearance tabs. Measure the actual occlusal clearance to the opposing tooth. Place one over the prep and have the patient close on it.
- Measured bite record. Have the patient close on a bite registration material over the prep, then measure its thickness with a caliper at the cusps and the fossa. In a comparison of bite records used to guide reduction, polyether tracked the final restoration much more closely than modeling wax.
- Articulating paper. Shows where the opposing tooth contacts, but not how thick the space is. Use it to find where to reduce, then measure.
- Scanner clearance map. A fast color map of the occlusal clearance against the opposing arch. It’s only as accurate as the bite scan behind it.
Check lateral and protrusive movements too, not just centric. A cusp that clears in centric can still strike the opposing cusp in a lateral movement, and that’s where the porcelain gets loaded.
The Bite Record Decides What We Measure
Our technicians measure occlusal clearance against the bite you send, so a distorted record gives a distorted answer. Wax softens with body heat and shipping temperatures, compresses and springs back, so the bite on the model may not be the patient’s bite. PVS bite registration is our first choice, and polyether also works well.
With an intraoral scanner, send one complete bite scan in maximum intercuspation, and scan the opposing arch back to the last molar. If a crown fits the model but comes in high, the record is the first thing to check. We’ll recheck our mounting and ask for a new scan or bite to find the cause. Digital Dental Lab
Over-Reduction Costs Something Too
Taking off more than the plan needs isn’t free insurance:
- Retention. Shorter axial walls lose retention and resistance form. On a short molar that can matter more than an extra half millimeter of porcelain.
- Tooth structure and the pulp. Every extra cut removes tooth you can’t put back, and young patients with large pulp chambers are at higher risk of exposure.
From the bench: on a PFM, extra space can’t simply be filled with porcelain. The porcelain layer has to stay even and supported by metal under the cusps, because porcelain that’s thick in one spot and thin in another is more likely to chip. So when a prep is over-reduced, we build the coping up to follow the crown’s final shape and keep the porcelain at its normal thickness. The crown will be sound; the lost wall height won’t come back.
When the Occlusal Clearance Isn’t There
Sometimes the occlusal clearance comes up short, at the chair or on our model. These are the real options, and what each one costs:
- Reduce more and send a new record. The cleanest fix. Adjust the prep, then rescan or retake the impression with a fresh bite. If the patient has already left, it means another appointment.
- Reduction coping or reduction guide. When we find a short area on the model and the patient has already gone, we can correct the die to the clearance the crown needs and make the crown to that die, together with a thin reduction coping or guide made on the same die. At the seat appointment, you place the guide on the prep and reduce wherever the tooth keeps it from seating, then seat the crown. It fits a small, local shortfall. Larger ones need a new prep and a new record.
- Metal occlusal surface. Keeps the crown strong in less space, since metal needs no porcelain over it. The trade-off is metal visible on the chewing surface, so talk it over with the patient first.
- Adjust the opposing tooth. Sometimes an over-erupted or sharp opposing cusp is the real problem. It takes tooth structure from the other arch, so it’s a clinical call that needs the patient’s agreement.
- Change the material. Monolithic zirconia, a full cast cobalt-chrome crown or a high-noble full cast crown works in less room than porcelain over metal.
- Thinner porcelain. A last resort. Strength comes first, so translucency and shade depth are what you give up, and we’ll explain the compromise before we make the crown.
None of these happens without your OK. A change of material or design always needs your consent, written or verbal.
How Istar Digital Handles Clearance on Every PFM Case
1. We Check Your Records First
You’ll hear within one working day if the records need a redo. We check every scan for noise, missing areas and bite errors. If the data or the bite won’t support an accurate clearance measurement, we tell you then, not after the crown is made.
Your part: send the prep arch, the opposing arch and the bite as separate files.
2. We Measure the Space Before Design
A tight case gets your sign-off before production. Technicians measure occlusal clearance on the model. Cases with insufficient space or a thin-wall risk go to you as a design preview with the short areas marked.
Your part: review the preview and choose the fix.
3. We Tell You Exactly Where to Reduce
No guesswork at the seat appointment. If extra reduction is the answer, we can put a note in the box saying which tooth needs how many millimeters off, or send a reduction coping or guide with the crown.
Your part: say which you’d prefer, on the Rx or when we contact you.
4. We Check the Bite Again Before It Ships
The crown leaves matching the plan you approved. Final inspection checks centric, protrusive and lateral contacts on the model, along with margins, contacts and seating. After glazing we check the occlusion again, since firing can shift it.
Your part: if a contact is slightly high at try-in, adjust and polish it chairside. If the crown doesn’t seat, the margin is open or the porcelain is cracked, stop and contact us.
For PFM alloys, porcelain systems and indications, see our PFM crowns and bridges.
Anterior PFM Crowns: Incisal and Facial Reduction
On anterior teeth the space question moves from the occlusal table to the incisal edge and the facial surface. Common teaching targets are about 2.0 mm of incisal reduction and 1.2–1.5 mm on the facial wherever porcelain covers it. On the lingual, about 1.0 mm is enough where the centric contact lands on metal; plan more where it lands on porcelain.
Two anterior details help with esthetics. A PFM masks a dark stump or a metal post without extra steps, which a translucent ceramic can’t always do. The metal collar can show as a dark line at the gingival margin, so ask for a porcelain margin in the esthetic zone.
Is PFM Still Worth Prepping For?
Yes, for the right case. In a systematic review of tooth-supported single crowns, metal-ceramic crowns had an estimated 5-year survival of 94.7%, close to the 96.6% for leucite- or lithium-disilicate-reinforced glass-ceramic crowns. PFM remains a sound choice for heavily loaded posterior teeth, bridges, dark or metal-cored abutments, and cases where cost matters more than maximum translucency. Where space is tight and the patient wants an all-white crown, monolithic zirconia usually asks for less reduction. Crown and Bridge Dental Lab
FAQ
Can the lab make room by reducing the cement space?
No. The cement space is inside the crown, between the intaglio and the prep. Changing it affects how the crown seats, not how thick the metal and porcelain can be on the outside. Occlusal clearance comes only from the prep, the opposing tooth or the crown design.
What if the tooth is a short second molar?
Short clinical crowns and limited access often make second molars the hardest place to get both clearance and retention. Every millimeter of occlusal reduction comes off an already short wall. A metal occlusal surface or a full cast crown often solves the space problem without shortening the walls further. Grooves or boxes help retention on short walls.
What should the Rx say on a tight case?
Three things. First, whether the occlusal surface is porcelain or metal. Second, “occlusal space inadequate” with the clearance you measured. Third, what you want if it’s short: a call, a note in the box, a reduction coping or guide, or a metal occlusal surface. With that on the Rx, we design to the real space from the start.
If a remake needs a new prep, is it still covered?
Yes. When we remake a crown under our remake policy and the tooth needs a new prep for it, the remake is still free. A new prep outside a remake counts as a new case. We pay return shipping on finished work, remakes included. Remake & Warranty Policy
Send Us a PFM Test Case
We’re happy to start with a single trial case. Prep it to the plan above, tell us whether the occlusal surface should be porcelain or metal, and send the scan or impression with a PVS bite. If the space is short anywhere, you’ll hear from us before production, with options.
- PFM crowns and bridges made in our own labs in Shenzhen and Huizhou, China
- Design approval before production on any case with tight clearance
- No material or design change without your consent
- 3-year warranty on crowns and bridges
- Return shipping on finished work and remakes paid by Istar Digital
- FDA-registered establishment (Registration No. 3039441248)