Patient Situation
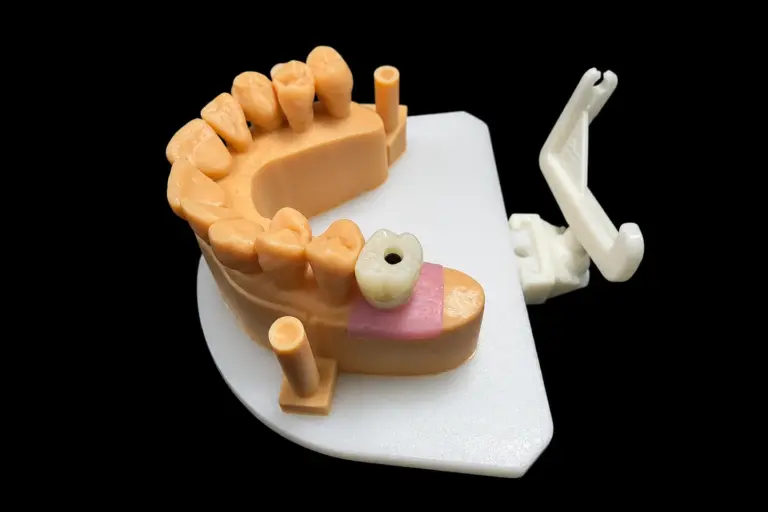
The patient , in their late 60s , had worn a full upper denture for about six years . The request that started it all: no more denture adhesive . The lower arch still had all its natural teeth back to the second molars .
Three things shaped the whole job on these upper dental implants:
The surgeon and the dentist made the clinical calls before the upper dental implants case reached us. Six implants was one of them. The ITI consensus found no significant survival difference in the upper jaw between fewer than five implants and five or more. It also asks you to think about what losing an implant later would do to the bridge. That was the dentist’s thinking here .
The graft also ruled out same-week loading. ITI lists simultaneous bone augmentation as a relative contraindication to immediate loading, so the dentist waited five months and kept the patient in the relined denture . Good news for us: that denture became our lip support reference.
What the Dentist Asked For
The Rx came down to six points :
Points 2 and 3 are the hard ones on full upper dental implants, and here’s why. An Inside Dental Technology article on choosing an upper implant prosthesis comes down to three parameters: prosthetic space, lip support, and the transition line. A fixed bridge has no flange. So whatever the flange was doing has to come from the shape of the bridge itself.
What We Checked Before Designing
Every set of upper dental implants gets these checks first. Most of it is boring. It’s also where bad cases get caught.
The Problems in This Upper Full Arch Bridge
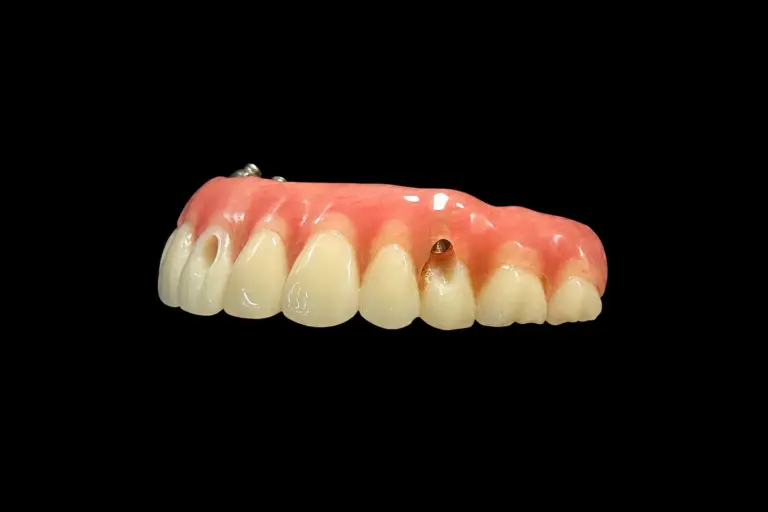
A screw hole on the front of #7
Our first design preview had the straight channel at #7 coming out on the facial, about 2 mm below the incisal edge . That breaks point 4 of the Rx. The fix had a limit, too: an angled channel can only go as far as the implant maker allows.
We read the offset in the software, then moved the opening to the cingulum with a 20° angled channel, inside that system’s limit . Then we checked the screw path in 3D for interference, and checked the wall around the channel. The dentist approved it before anything got milled .
The first PMMA try-in
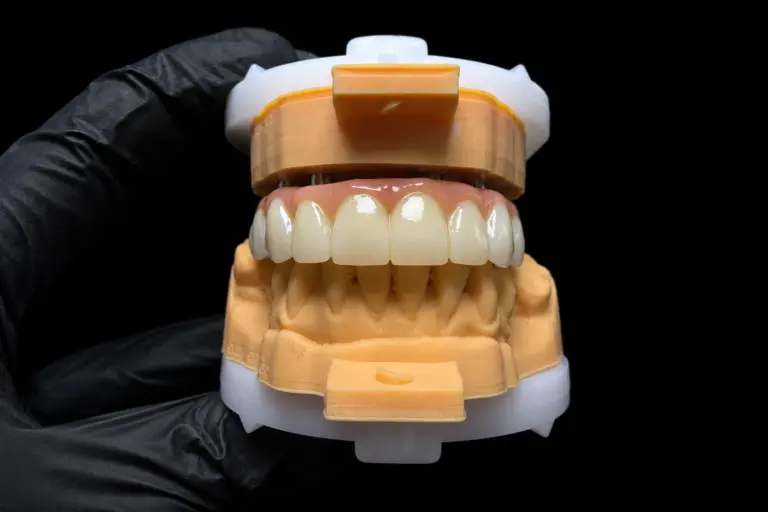
We shipped the first milled PMMA on working day 4 . It seated without rocking, and it passed the one-screw test on all six abutments . Midline, bite height, and tooth shape all looked right, and #3 just needed one contact lowered .
Then the patient smiled. Two problems :
No model tells you this. You need a face, and you need the prototype in the mouth.
Why you can't just add more pink
On upper dental implants, both fixes pull on the same area. Taking the pink higher hides the line. Thickening it brings the lip out. But do both without thinking, and you’ve got a bulky bridge that traps food, and that breaks point 5.
We use at least 2 mm of cleaning space between bridge and tissue, and we weren’t giving that up.
How We Met Each Requirement
We sent the dentist the marked photos and three options through the case’s WhatsApp group :
| Option | What it means | The catch |
|---|---|---|
| Reduce the ridge | Moves the line up and out of sight | The dentist’s call; it means removing tissue around new abutments and a graft |
| Reshape the pink | Pink goes higher and fuller, teeth stay put | More bridge to keep clean |
| Go removable | A flange gives the lip back | Not what the patient wanted |
The same article suggests ridge reduction when the ridge shows, if it’s safe to do, and leans removable when the lip needs a flange. So we said plainly that reshaping the pink might not get there. The dentist looked at the graft and passed on reduction, and the patient didn’t want removable. Test the pink in PMMA first, the dentist said .
So on the second PMMA, we took the pink 1.5 mm higher and made it about 1 mm fuller from #6 to #11 . The tissue side stayed smooth and convex, with no ledges. Teeth didn’t move.
| Dentist’s requirement | What we did | How we checked it |
|---|---|---|
| One-piece bridge on six abutments | One shared path across all six | No rocking on the model, no force, no pulling down with screws |
| No visible line at full smile | Pink carried 1.5 mm higher, #6 to #11 | Full-smile photos at the second try-in |
| Lip support, no flange | Pink about 1 mm fuller, using the old denture as the reference | Side-by-side photos with the old denture |
| No facial screw holes | 20° angled channel at #7 | 3D screw path check, then final check with the real screw |
| Cleanable tissue side | Convex surface, at least 2 mm of cleaning space | Checked in design, then on the model under magnification |
| Final within 7 working days | Design approval, then production | Shipped on working day 7 |
From PMMA to Final Zirconia
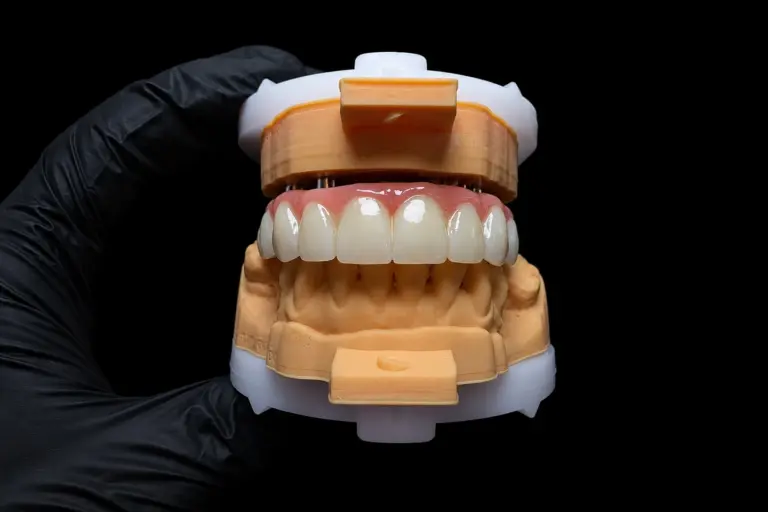
The second PMMA went out on working day 3 of that round . The line was gone at a full smile, and the lip matched the old denture . The dentist had the patient wear it for three weeks , and that turned up something no model would’ve shown. Food kept collecting under #11, so the dentist trimmed the tissue side there and sent a new scan .
Here’s what carried over to the zirconia, and what didn’t:
| Copied from the approved PMMA | Built new |
|---|---|
| Bite and bite height | All implant interfaces, from the implant library |
| Tooth position and outer shape | The adjusted inner surfaces of the prototype, which we threw out |
| Pink height and fullness | |
| Screw channels, including #7 | |
| The dentist’s trim at #11, added as its own design change |
Then:
The Finished Upper Dental Implants Bridge
Here’s how the try-in findings ended up :
| Check | First PMMA | Second PMMA | Final zirconia |
|---|---|---|---|
| Transition line at full smile | About 1.5 mm showing | Not visible | Not visible |
| Lip beside the nose | Flat next to old denture | Matched old denture | Matched second PMMA |
| Screw hole at #7 | Cingulum | Cingulum | Cingulum |
| Fit | No rocking | No rocking | No rocking on the model |
| Tissue side at #11 | Not yet tested | Food trap, trimmed by dentist | Trim carried over |
Feedback After Fitting
The bridge seated at the first appointment, with screws torqued to the implant maker’s numbers. One light contact at #14 needed adjusting .
No more adhesive. Using a water flosser daily. No food complaints at the three-month check .
What This Design Still Needs
A fuller pink area on upper dental implants is a trade-off. It’s more surface to clean, so the dentist booked regular hygiene visits with the bridge off . And we won’t oversell the material: a 2023 narrative review of zirconia full-arch work reports 88% to 100% survival, with most complications fixable by the clinician. Those are group numbers, not a promise for this bridge. Three months is a start, not a verdict.
Sending Us Upper Dental Implants Cases
Want a preview that catches this stuff early? Send:
The final stage of an upper full arch bridge takes 5–7 working days. Try-in rounds, clinic visits, and shipping come on top of that.
Who Made It
This upper full arch bridge ran through our implant dental laboratory team of about 80 technicians, and a separate QC team of about 25 inspected it before it shipped.
Istar Digital Dental Lab runs four labs in Shenzhen and Huizhou, China. We’ve been doing this since 2012, we have about 460 people, and nothing gets outsourced. We’re an FDA-registered establishment (Registration Number 3039441248), and you can look us up in the FDA establishment registration database. Our labs run an ISO 13485 quality management system, and custom-made work for EU clinics follows the MDR custom-made device procedure. Want to see it? Visit the factory or book a video tour.
Full Upper Dental Implants FAQ
Do you work with my implant system?
Most likely. We restore upper dental implants from most systems on the market. If your implant library differs from ours, we’ll use yours.
Can you supply the parts?
Yes: titanium bars, multi-unit abutments, temporary cylinders, screws, and tools. Parts are charged separately, and their batch and supplier records are traceable.
Do I have to use one-piece zirconia?
No. We also make titanium bar with zirconia or resin teeth, titanium bar with PMMA, and PFM. Space and strength usually decide it. For more options, see our All-on-X page.
Do you make immediate load temporary bridges?
Yes, along with the final bridge. Tell us your timing early. We’re in China, so shipping has to be part of the plan.
What if the patient needs a flange after all?
Then a removable design on the upper dental implants may suit better. Here’s an upper implant denture case built around that question.
What if I want a design you think is risky?
We’ll tell you why it worries us. Want it changed? We change it. Prefer your design? We’ll build it to your Rx, with no sign-off form. Remakes caused by that design aren’t on us, though.
What does the warranty cover?
An upper full arch bridge like this one carries a 3-year warranty. Problems on our side, like a bridge that won’t seat, a high bite, or a color that’s off, get adjusted or remade free. If you change the basic requirements or the material, or ask us to go ahead on records we’ve flagged as unclear, the remake is charged. You pay to send records in, and we pay to ship finished work back, remakes included.
How does pricing work?
We don’t publish prices on the website. Ask for our price list, and we’ll quote each upper dental implants case item by item, so you can see what the parts and try-ins add. Single trial cases are welcome, and ongoing partnerships suit clinics with a regular case flow.
Send Us Your Next Upper Case
Got a patient with full upper dental implants, a high smile, and a denture flange doing the lip’s work? Send the case with your smile photos. You’ll see the design, with the tight spots marked, before we make anything.