Patient Presentation
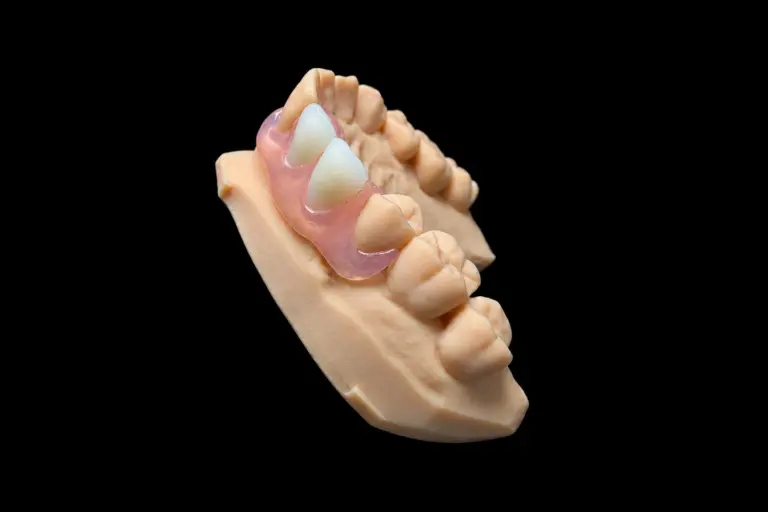
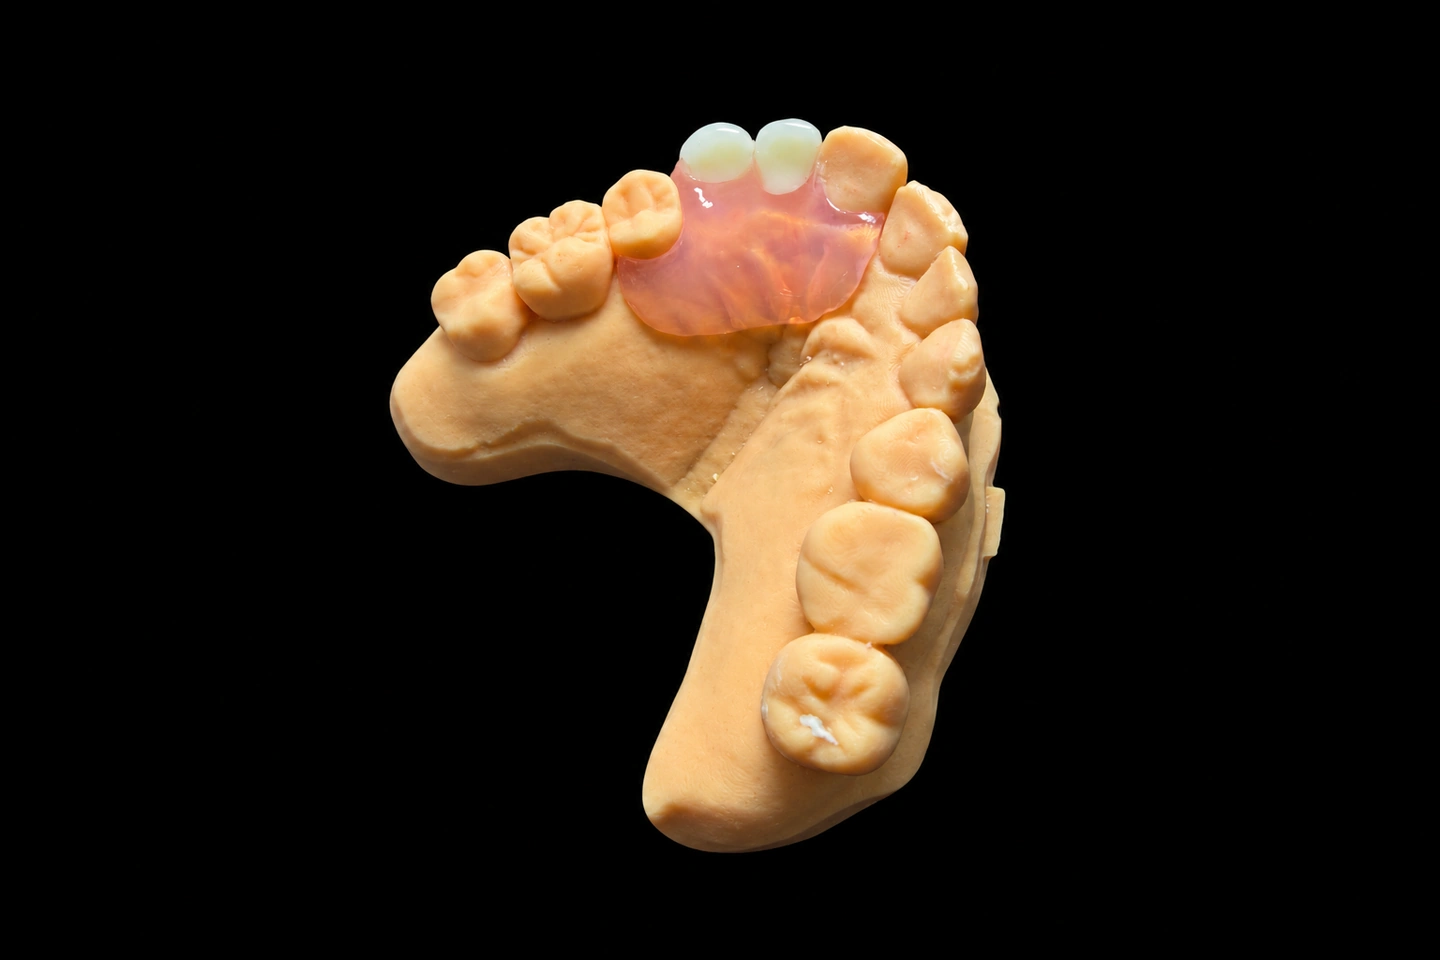
A female patient presented with congenital absence of the maxillary right lateral incisor. Her adjacent teeth showed previous composite resin restorations with noticeable color discrepancy. After orthodontic space opening, the patient was planning implant placement but faced a critical gap: 3 to 6 months of osseointegration before the final crown could be seated.
The patient needed a temporary solution that met two competing requirements: appear unnoticeable in social settings, yet remain stable enough to wear during meals. On paper this sounds straightforward. In reality, these two goals pull in opposite directions.
The Clinical Dilemma
The dentist who received the case outlined several options:
Each pathway presented a different risk profile. Choosing the removable approach (Essix) meant compromising on wear functionality. Choosing the fixed approach (Maryland) meant additional micro-etching and bonding to adjacent teeth that were already compromised by old composite work and color mismatch.
The turning point: Rather than forcing a binary choice, the dentist decided on a dual-approach strategy: Valplast removable (as primary) with Essix as backup. This isn’t about hedging; it’s about matching the material to the actual clinical window and patient priorities.
Translating Clinical Needs into Design Parameters
This is where our work begins. The dentist’s brief sounded general:
“Needs to be invisible, must be wearable during eating, but also account for the neighboring tooth color issue”
Converting this into manufacturing specifications requires breaking it down into three specific decisions:
① Clasp Coverage and Visibility
Valplast (polyester resin) is inherently transparent—more so than acrylic. But “invisible” depends entirely on clasp design and palatal surface area. We designed the clasps in transparent Valplast rather than metal or opaque material, and kept the palatal coverage to a medium footprint (approximately 40% of the hard palate).
The tradeoff is deliberate: smaller palatal coverage means better tongue comfort and minimal taste interference during eating, but it also means lower retentive force. This requires higher precision in clasp undercut positioning.
② Shade Matching Adjacent Teeth
The color discrepancy between the natural tooth and old composite resin needed direct handling. We shade-matched to the natural tooth (A2) and the existing composite (D2), then designed the pontic as a transitional color between them. We couldn’t make the neighbors match each other—that’s a problem for the final implant crown—but we could ensure the temporary tooth looked like a natural bridge, not a patch.
③ Stability During Function
Valplast has measurably higher flexural strength than traditional acrylic, with better fatigue resistance. This matters when a patient is chewing soft food (noodles, rice, soft bread). We calculated the clasp undercut position to deliver a retentive force in the 8–10 N range: enough to prevent unwanted movement, light enough to avoid stress on the neighbors.
Fabrication Workflow and Tradeoffs
Why the Material Choice Came with a Cost
On the surface, Valplast and acrylic might look similar in the lab. They’re not.
The dentist accepted this tradeoff because 6 to 12 months of color stability outweighs waiting 3 extra days. This was an explicit negotiation, not a hidden cost.
Why We Didn't Pursue the Maryland Bridge
Single-wing Maryland bridge designs do offer “wear during eating without removal.” But the clinical context ruled it out:
Final decision: Valplast removable as the daily appliance, Essix as emergency backup (only if the patient needed to leave it in for extended social events where removal wasn’t an option).
Prosthesis Design Details
Clasp Architecture
We prototyped two clasp designs:
The dentist confirmed Version A, prioritizing invisibility.
Pontic Length and Gingival Contour
The original tooth had been extracted years ago, so the interdental papilla was already resorbed. The pontic needed to compensate visually without over-contacting the opposing ridge.
Design approach:
Thickness Control
We designed the Valplast thickness at 1.5–2.0 mm. Thinner than typical acrylic, but Valplast’s inherent strength makes this possible. The patient benefits from better oral comfort and less bulk feeling during speech.
Shade Coordination
Because of the existing color discrepancy, we conducted a three-part shade assessment:
Under natural light, the final pontic reads as a natural color progression, not a discrete mismatch.
Delivery and Follow-up
First Insertion
On delivery day, the dentist performed three critical checks:
No adjustments were needed at insertion.
Two-Week Follow-up
Patient reported: “No visibility in normal conversation. Can eat rice and noodles without concern. Nobody notices it.”
Only minor observation: Patient learned to remove it before sleep to prevent overnight micro-movement from clenching.
One-Month Review
Material remained uncolored. Clasp elasticity was stable. Patient had integrated the daily insertion/removal routine without difficulty.
Why Valplast Over Traditional Acrylic
The material choice hinged on a specific clinical scenario: long-term stain resistance when worn during all meals.
Traditional acrylic has a water absorption rate of 1–2%, which means it will absorb staining compounds from food and beverage (coffee, tomato, curry). Over 3–6 months of daily wear during eating, this translates into visible yellowing or discoloration.
Valplast’s water absorption is approximately 0.3%—one-fifth of acrylic’s rate. It resists dietary staining significantly better. From a materials perspective, this directly solves the most common complaint in long-term removable prosthetics: color fade undermining the cosmetic gains.
The dentist and patient both agreed: spending 3–5 extra days in fabrication and accepting a modest fee increase was worth eliminating the color degradation risk over the 6-to-12-month implant osseointegration window.
Complete Fabrication Timeline
| Phase | Duration | Our Work |
|---|---|---|
| Case intake & validation | Day 0 | Receive impressions/scan data; confirm adjacent tooth shade information; validate design feasibility |
| CAD design & approval | Day 1–2 | Complete 3D design (clasp position, pontic contour, thickness model); generate renderings for dentist review; incorporate design feedback (typically 1 revision cycle) |
| Material preparation | Day 3–4 | 3D model printing; Valplast pre-heating and thermal conditioning; initial pontic forming |
| Refinement & QC | Day 5–6 | Clasp fine-tuning, gingival margin finishing, final shade validation against shade tab, surface polishing |
| Sterilization & dispatch | Day 7 | Final QC inspection, steam sterilization, secure packaging, shipment |
The critical communication checkpoint is Day 1–2. If the dentist’s design feedback signals a major revision (e.g., clasp position needs to shift), the timeline extends proportionally. This case passed design review on the first round, so delivery stayed on schedule.
Patient Outcomes & Long-Term Monitoring
Three-month assessment
- No color shift detected. Shade match to adjacent teeth remains clinically acceptable.
- Clasp elasticity and retention force unchanged.
- Patient reports eating solid soft foods without restriction or appliance movement.
- Social comfort: “It’s become my second set of teeth.”
The success of this case wasn’t because our materials or techniques are uniquely advanced. It was because we defined the priority hierarchy clearly at the outset: invisibility > functional durability > initial cost. Within that framework, Valplast and transparent clasps became the obvious choice, not the premium option.