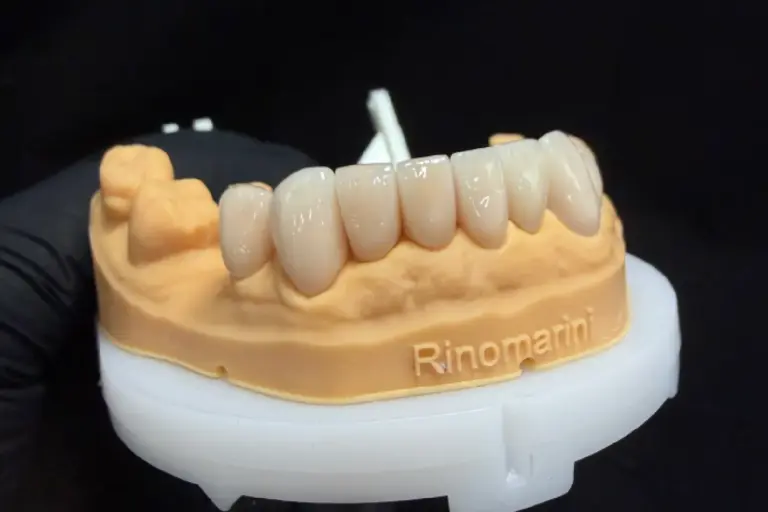
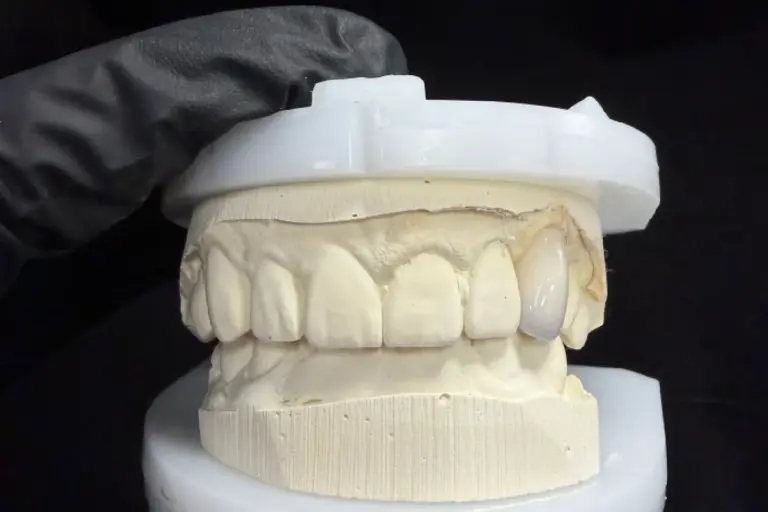
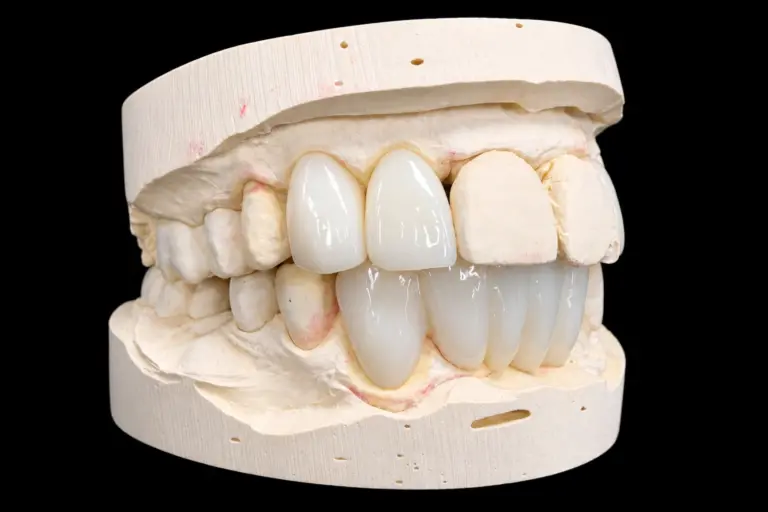
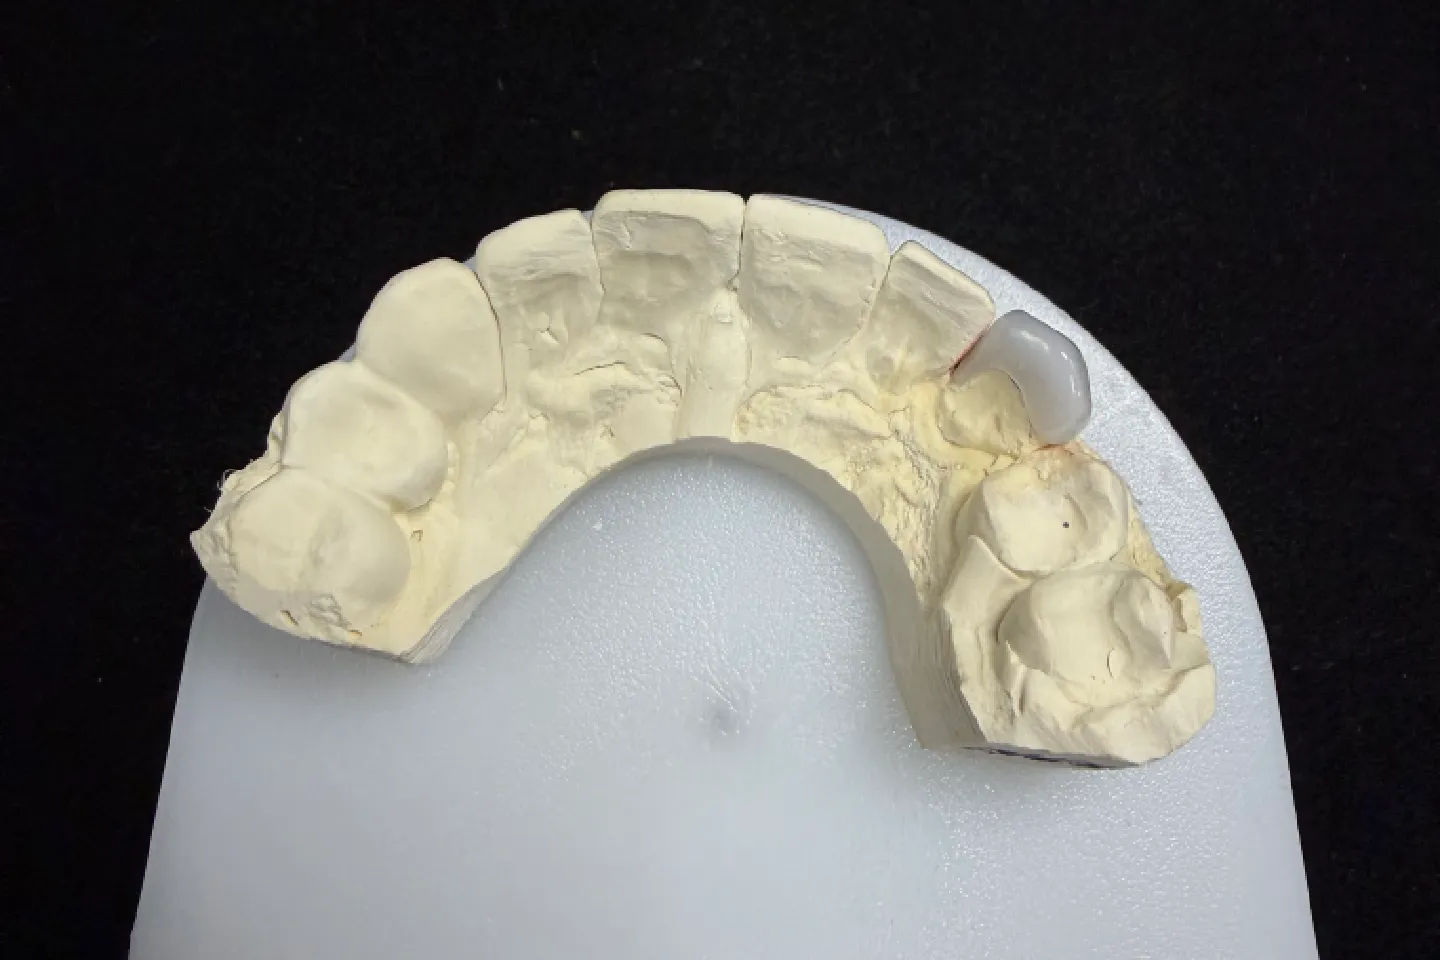
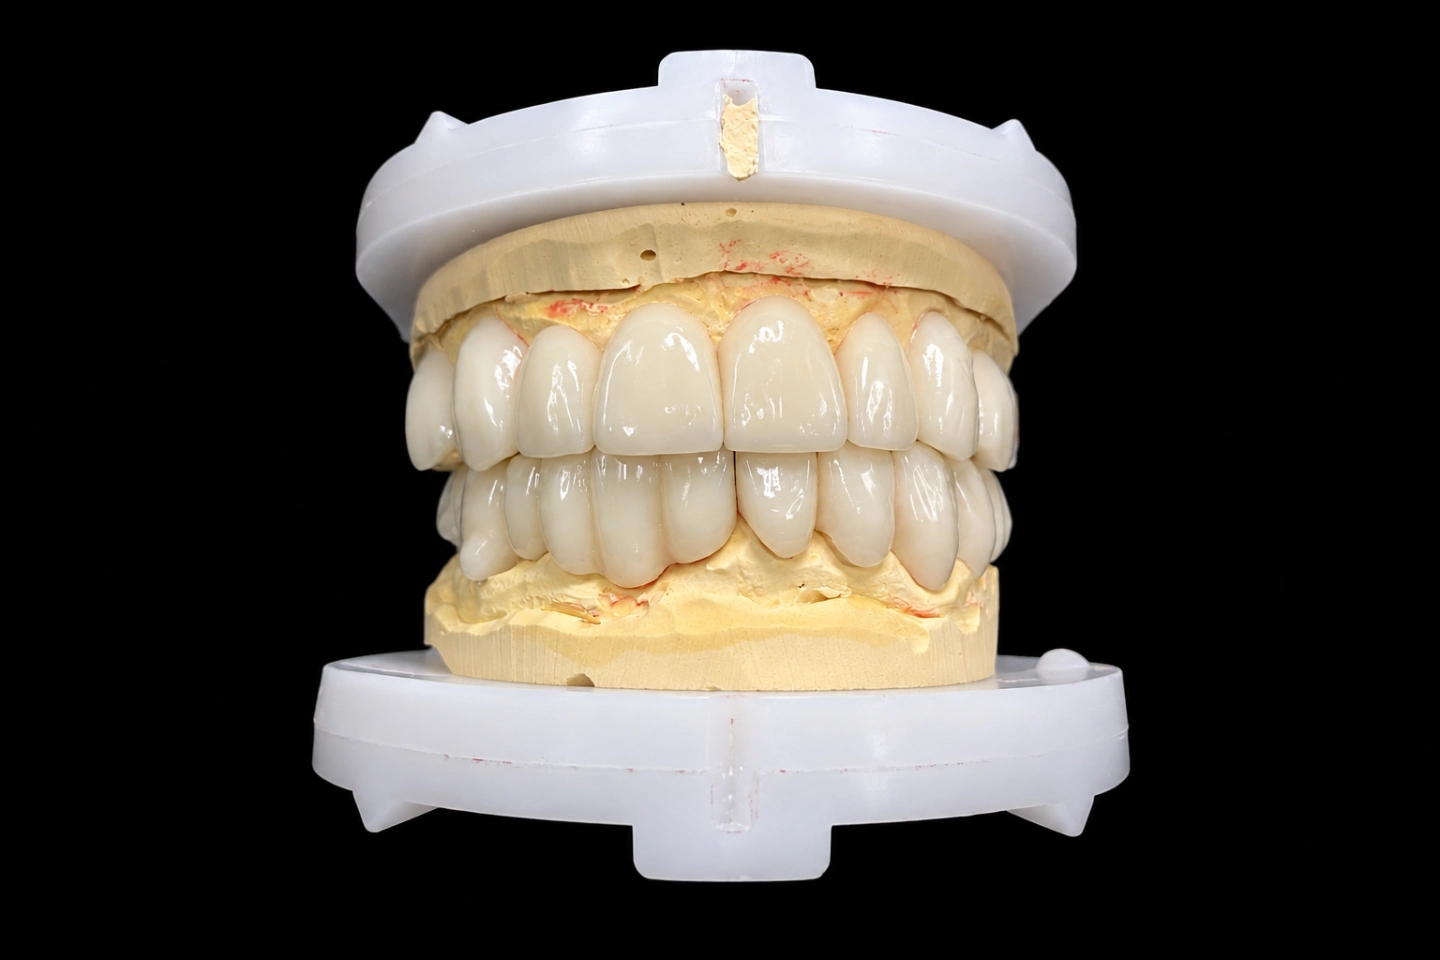
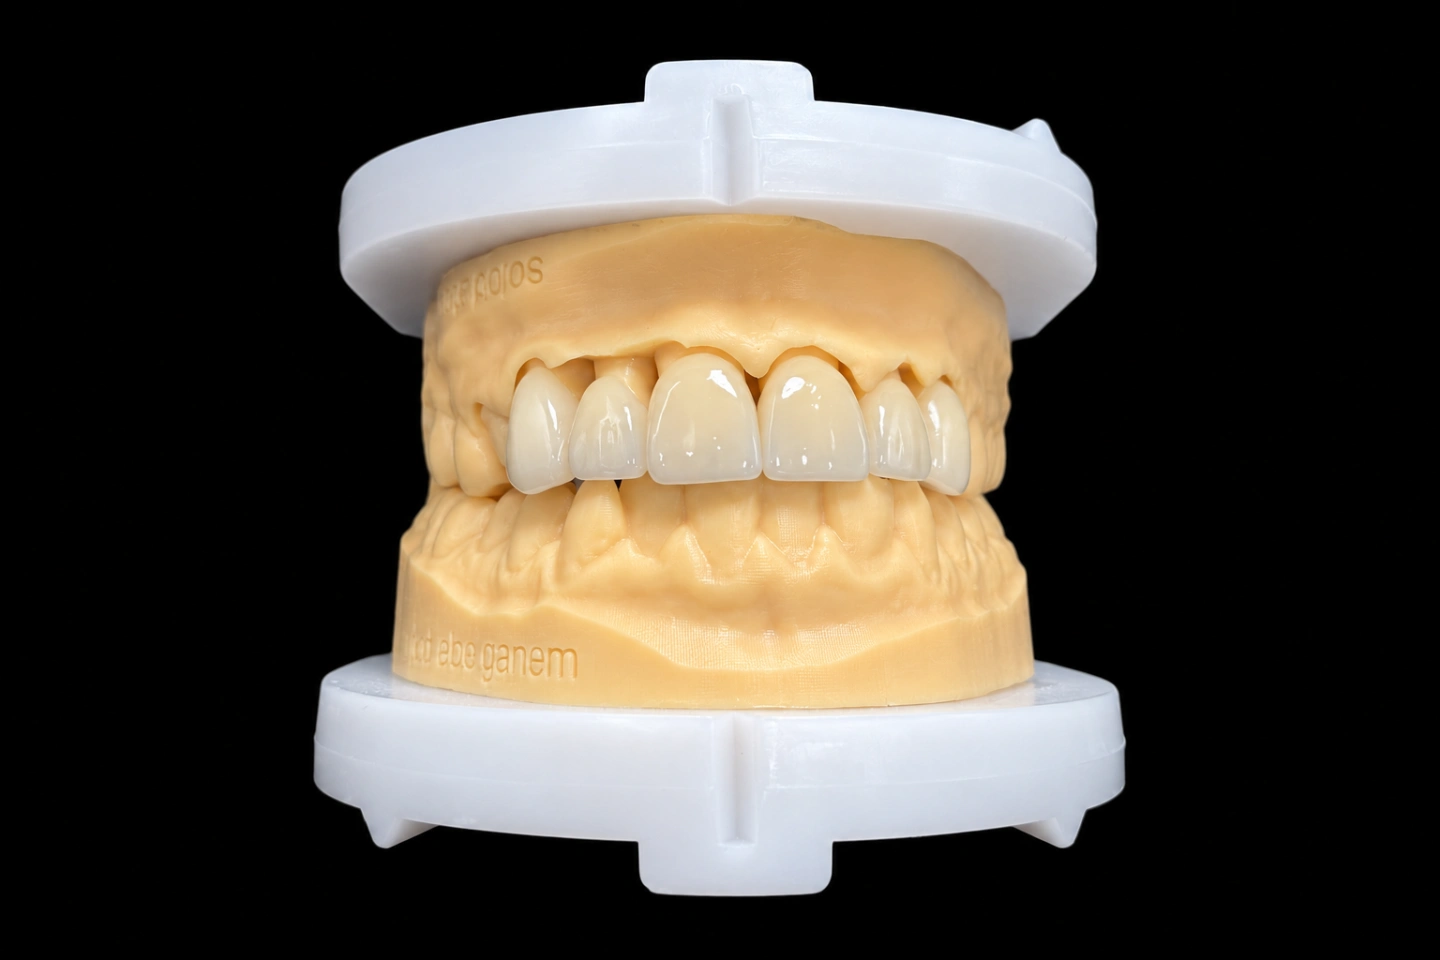
Patient Situation
The patient is an adult in their 40s who ground their teeth for years and has worn a night guard for a long time now . They came in about short, flat edges on both arches and a shade they didn’t like, so upper and lower veneers were on the table from the first visit. They reported no jaw pain or clicking .
The dentist raised the grinding history first, since the ADA says veneers may not be a good choice for people who clench or grind. They talked through a more conservative route with the patient. The patient chose ceramic and agreed to keep wearing a guard .
What the Dentist Asked For
From the Rx for these upper and lower veneers, and from our WhatsApp thread :
The Technical Problem With Upper and Lower Veneers Here
On top and bottom veneers, length on an upper edge and length on a lower edge don’t work separately. With the vertical held, they stack. On the centrals, the Rx took the overlap from 1.0 mm to 3.2 mm (1.0 + 1.2 + 1.0) .
Our first wax-up showed what that does. With 1.0 mm added and only 0.4 mm of room, the lower edges ran about 0.6 mm into the palatal surfaces of #8 and #9 at closed bite, right where the molars still needed to meet . The protrusive path started with a step too. Our design preview flags dynamic interference like this, so we marked it up and sent it over.
This isn’t just a lab quirk. A clinical report on lower veneers warns that lengthening lower incisors can create protrusive interference with restored upper teeth, and it says to plan guidance from the start.
Three Ways Out, and the Dentist's Call
| Option | #8, #9 added | #24, #25 added | Overlap at centrals | What it costs |
|---|---|---|---|---|
| 1. Keep the Rx | +1.2 mm | +1.0 mm | 3.2 mm | Palatal enamel on #8 and #9 has to come off to make room |
| 2. Hold the lower edges back | +1.2 mm | +0.4 mm | 2.6 mm | Lower edges end up 0.6 mm shorter than asked |
| 3. Open the bite | +1.2 mm | +1.0 mm | Depends on the opening | Back teeth need restoring too, which the Rx ruled out |
All values .
Option 3 was out early, because the dentist didn’t want posterior work and the back teeth were stable. A review of occlusal vertical dimension notes that ways of measuring vertical loss lack consistency, so worn edges alone didn’t make the case for opening up.
We didn’t push option 1 or 2. That decision belongs to the dentist. They picked option 2 and confirmed it in writing, because they’d rather give up some lower length than cut sound palatal enamel .
How the Mock-Up Changed the Upper and Lower Veneers Plan
The dentist made a mock-up chairside from a silicone matrix off our printed wax-up model, and the patient wore it for five days (a clear silicone matrix the lab made on the printed wax-up model). A three-year study of 79 upper and lower e.max Press veneers on worn teeth used the same order: wax-up, then mock-up, then prep. That study left out patients with parafunction, so its 98.7% survival doesn’t speak for a patient with this history.
The lower edges felt fine. The upper edges didn’t. On F and V sounds, #8 and #9 pressed too hard into the lower lip, so the dentist trimmed about 0.2 mm off the upper edges of the mock-up, rechecked speech and sent us a new scan . The whole upper set moved with them, which brought the overlap down to 2.4 mm .
Here’s the plan that went to production:
| Teeth | Pre-op length (mm) | Rx asked | Final added | Final length (mm) |
|---|---|---|---|---|
| #8, #9 | 9.6 | +1.2 | +1.0 | 10.6 |
| #7, #10 | 8.0 | +1.0 | +0.8 | 8.8 |
| #6, #11 | 9.6 | +0.6 | +0.4 | 10.0 |
| #4, #5, #12, #13 | – | None | None | Unchanged |
| #24, #25 | 7.0 | +1.0 | +0.4 | 7.4 |
| #23, #26 | 7.4 | +0.8 | +0.4 | 7.8 |
| #22, #27 | 9.0 | +0.6 | +0.3 | 9.3 |
How We Met Each Requirement on These Top and Bottom Veneers
No opening of the bite
The premolar veneers stay on the buccal, so their chewing surfaces and the molars kept holding the vertical. We asked for the scans in order: pre-op and mock-up scans of both arches, then upper prep, then lower prep, with a bite scan after each . There was always something unprepared to line the arches up against. A VPS bite registration backed that up. Skip wax on a case like this, since it can soften and distort in transit.
We copied the approved edges from the mock-up scan instead of redesigning them, so function carried over along with the look.
A smooth path in protrusive
In the design, we marked every lower contact on the palatal surfaces of #6–#11 and sent that map to the dentist before the prep . They kept the upper palatal finish lines about 1 mm clear of those marks, so the lower edges don’t cross a join between ceramic and tooth .
The lower edges then got a clean, rounded profile and a polished surface, since they run against natural palatal enamel . We checked centric, protrusive and lateral moves on printed models before the veneers left the lab.
Enough ceramic on small lower teeth
A lower incisor doesn’t give you much to work with on a set of upper and lower dental veneers. That clinical report aims for about 0.4–0.6 mm of reduction on these teeth and uses a pronounced incisal chamfer to avoid thin edges, which can crack during bonding.
The dentist took about 0.4 mm facially on the lower teeth and 0.5 mm on the upper teeth, and wrapped the edges on #6–#11 and #22–#27 . Wrapping fits the data too: a systematic review of 25 studies and 6,500 veneers found fewer failures with incisal coverage than without it. Fracture was the most common complication, followed by debonding, and both showed up more in the early years.
Dentin on the lower edges
Wear had already exposed dentin on #24 and #25, so the dentist marked it on a photo, about a quarter of the bonding area on each . That’s worth knowing up front. A review of bonding substrates reports better results on enamel than on dentin or old composite, though it only covers six studies. A 36-month study of 130 pressed veneers found similar results in both jaws, but more interventions when over half the preparation was exposed dentin.
So the dentist used the mock-up to guide the reduction and kept the rest of the prep in enamel .
One shade across two arches
Same target, different starting point, and that’s the catch with upper and lower dental veneers. The lower veneers are thinner and sit on darker stumps, so the same ingot would’ve read darker than the upper set. We planned color in a set order: stump shade, then target, then layers. That gave us a slightly less translucent ingot on the lower set than on the upper set, both aiming at A1 (IPS e.max Press LT A1 on the upper set, MT A1 on the lower set).
We cut back only the incisal third, with less edge translucency on the short lower teeth so they wouldn’t go gray (about 0.3–0.5 mm, layered with IPS e.max Ceram incisal porcelain). Both arches were pressed and finished together by the same technician (one ingot batch, the same firing cycles), and each layer, stain and batch went into the case record.
Why pressed e.max for this set
The dentist specified it for these top and bottom veneers, and all our e.max veneers are pressed. A 2025 review of ceramic veneers found no survival difference between feldspathic, leucite-reinforced and lithium disilicate at 10.4 years. Lithium disilicate had the lowest complication rates, with 6.1% technical. Those are pooled numbers, though, not a forecast for one patient.
Making the Upper and Lower Veneers, Step by Step
Dentist and Patient Feedback on the Upper and Lower Veneers
The dentist tried in the upper and lower veneers with paste, then sent us photos and notes on WhatsApp . In short:
the edges matched the mock-up, and the arches lined up with the planned contacts. One contact on #25 ran a little heavy, so they eased it chairside, polished it and bonded the set with resin cement at the same visit .
happy with the upper edges and the color. They noticed the lower teeth are a bit shorter than the first picture they’d seen, but they said speech felt normal and they didn’t want anything changed .
Finished Upper and Lower Veneers: Design Goals and Results
| Design goal | How it was checked | Result |
|---|---|---|
| Vertical unchanged | Molar contacts on the printed models, then at bonding | Same contacts as pre-op |
| Overlap at the centrals: 2.4 mm | Finished veneers against the design file | 2.5 mm |
| Lengths as approved | Finished veneers against the design file, measured on the model | Within 0.1 mm |
| No new interference in protrusive or lateral moves | Printed models, then the dentist’s check at bonding | One heavy contact on #25, adjusted chairside |
| Lower arch reads the same as the upper | Standard light at the lab, try-in photos | No visible step between arches |
| Lip clear on F and V sounds | Dentist’s speech check at try-in | Passed |
It wasn’t all a win. The lower edges finished 0.6 mm short of the original ask on the centrals, and the upper centrals finished 0.2 mm short . That was the price of keeping the vertical and the palatal enamel, and the dentist chose it knowing that.
The dentist also ordered a new night guard from a post-bonding scan, so the patient goes home with protection that fits the new edges .
What to Send Us for Upper and Lower Dental Veneers
Upper and lower veneers generally take 5–7 working days in our lab. A diagnostic wax-up stage runs 2–3 working days, and design approval adds 1–2 days.
Who Made It
These upper and lower veneers went through our CAD design team (about 100 people), our ceramic and metal department (about 70) and a separate QC team of about 25. They work inside Istar Dental Lab’s four labs in Shenzhen and Huizhou, China. We’ve been running since 2012, with about 460 staff and no outsourcing.
Istar Dental Lab is an FDA-registered establishment (Registration Number 3039441248), which you can look up in the FDA establishment registration database. Our labs run an ISO 13485 quality management system.
Upper and Lower Veneers FAQ
Do I have to send upper and lower veneers at once?
No. You can send the upper arch now and the lower arch later. We keep approved contours on file, so the second arch can start from them. Send new shade photos with it, since we’ll be matching ceramic that’s already in the mouth.
Can you make just top veneers, with no lower set?
Sure. How many teeth to restore is your call, and we’ll make what’s on the Rx. Send a smile photo that shows the lower teeth, so we can see what the upper set will sit next to.
What if I do plan to change the vertical?
Send a facebow record and tell us the planned bite. We’ll copy that record into a try-in for you to check before anything final gets made.
Do you accept physical impressions?
Yes. Send VPS impressions of the prep and opposing arches.
Can I send a provisional or a sketch as a reference?
Yes. Old restoration photos work too, and so do sketches.
What other veneer materials do you make?
Zirconia, which is stronger and more wear-resistant, and lab-made composite. Compare them with pressed e.max veneers, or see what else our e.max lab makes. We won’t swap a material without your OK.
Can I change a design after approving it?
Yes. Tell us early, and it won’t affect the lead time or the fee.
What if I stick with a design you think is risky?
We’ll make it to the Rx with no sign-off form, but a remake caused by that design isn’t on us.
What's free to redo, and what isn't?
Open margins, open contacts, high bite, a veneer that won’t seat, inaccurate color, visible flaws and poor shape are ours to fix for free. Changing the shade or material afterward isn’t free, and neither is a case you asked us to try on an impression we’d already flagged as poor.
What about warranty and shipping?
Veneers carry our 3-year warranty. You pay to send a case in, and we pay to ship finished work back, remakes included.
Can you rush a case like this?
Rush service is free for clients who send us 10 or more cases a month. We guarantee the ship date, but not the arrival date, because customs times vary.
How is pricing handled?
We don’t publish prices on the website. Ask for our price list, and we’ll quote each case item by item to your requirements. Ongoing partnerships suit clinics with a regular case flow.
Send Us Your Next Upper and Lower Veneers Case
Got a request for top and bottom veneers, with worn edges and not much room between them? Send the pre-op scans, and we’ll show you what fits before you prep. Single trial cases are welcome, and you can see the work for yourself on a factory visit or video tour.