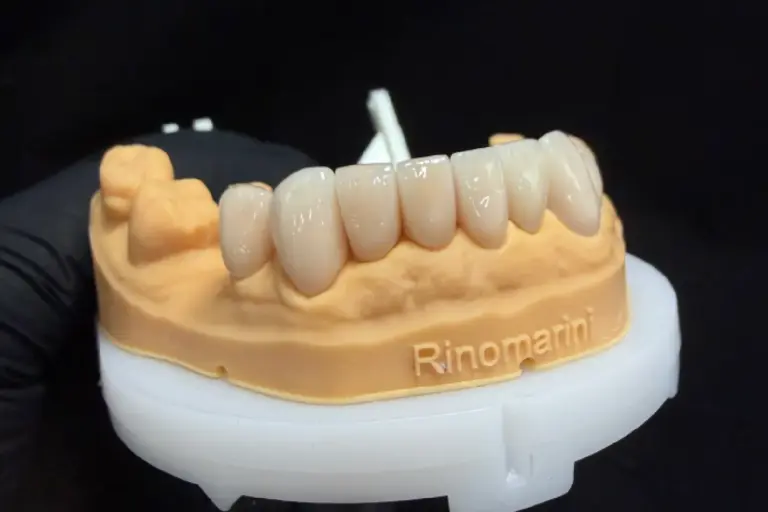
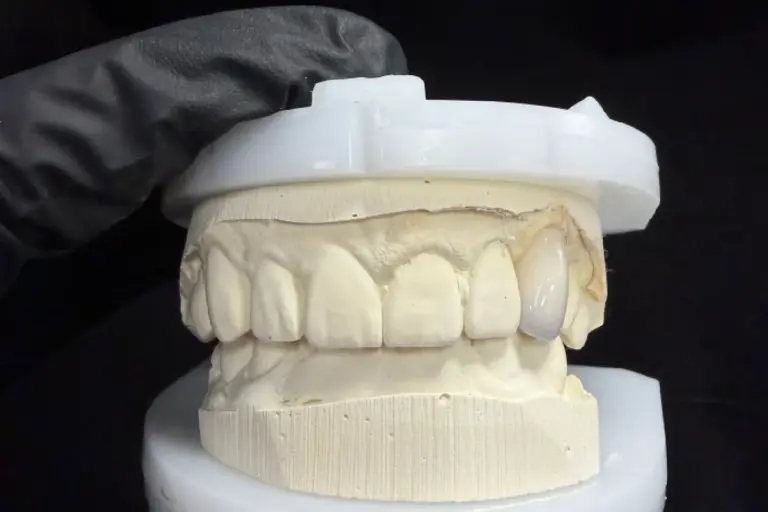
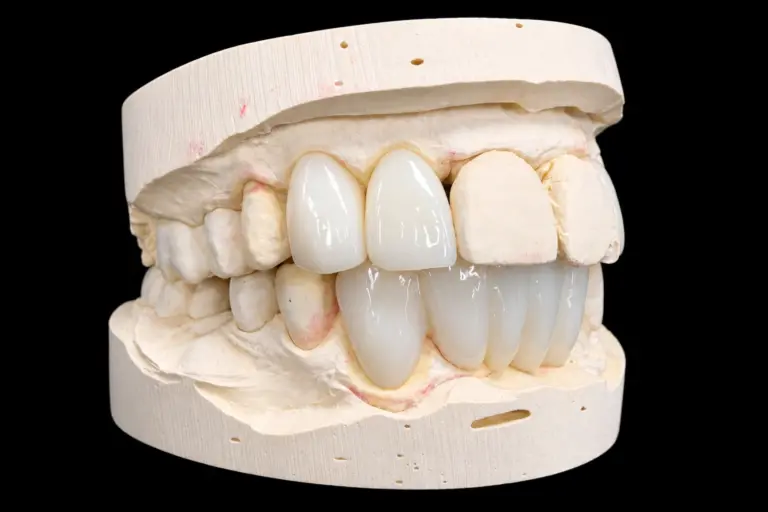
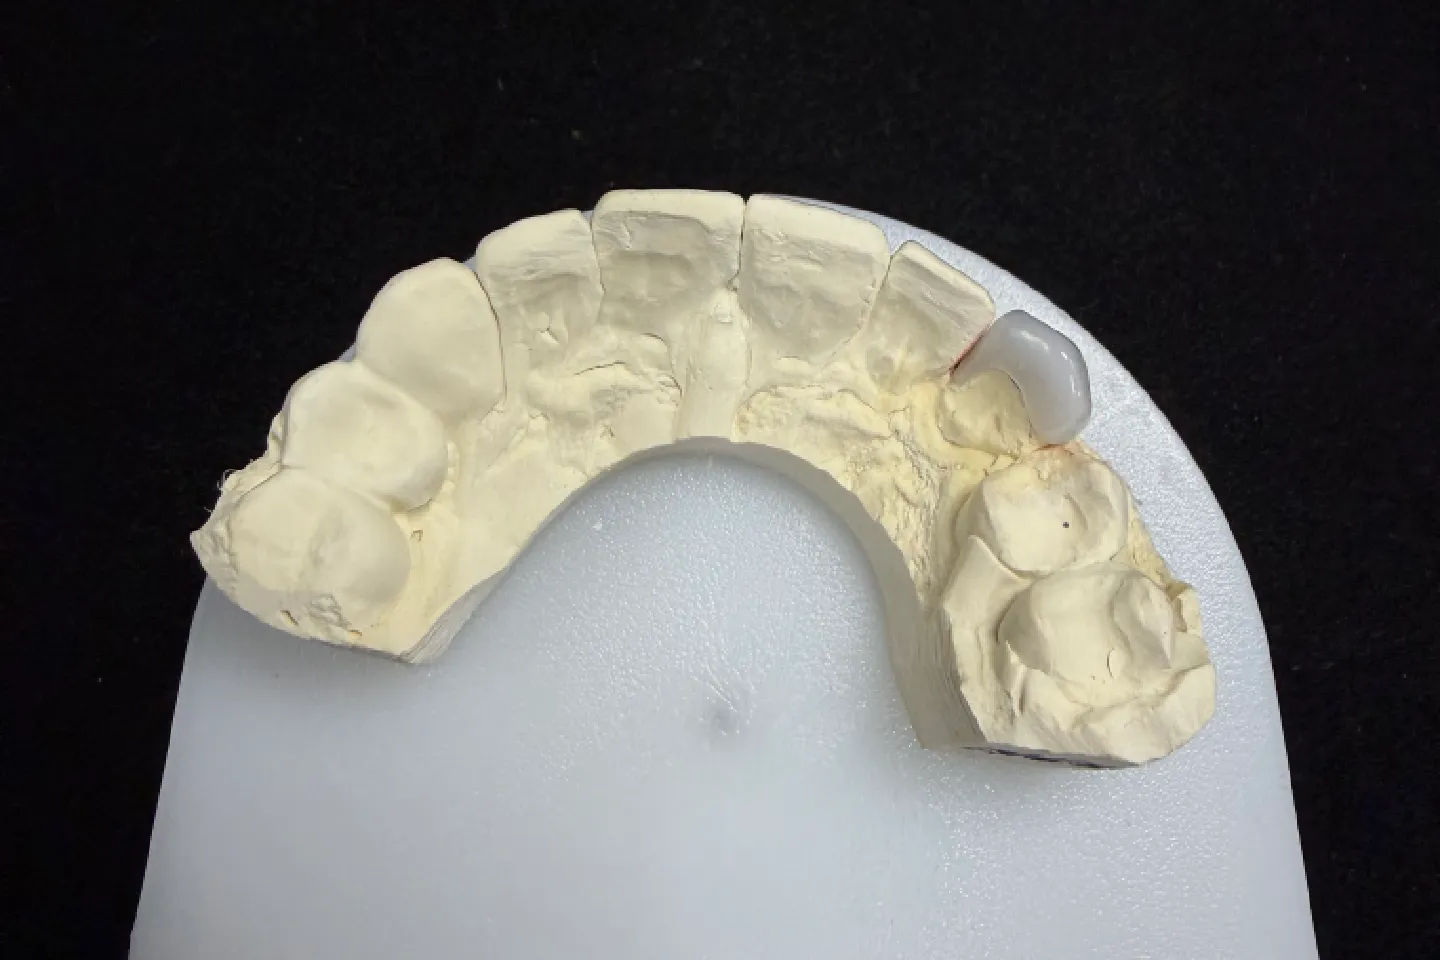
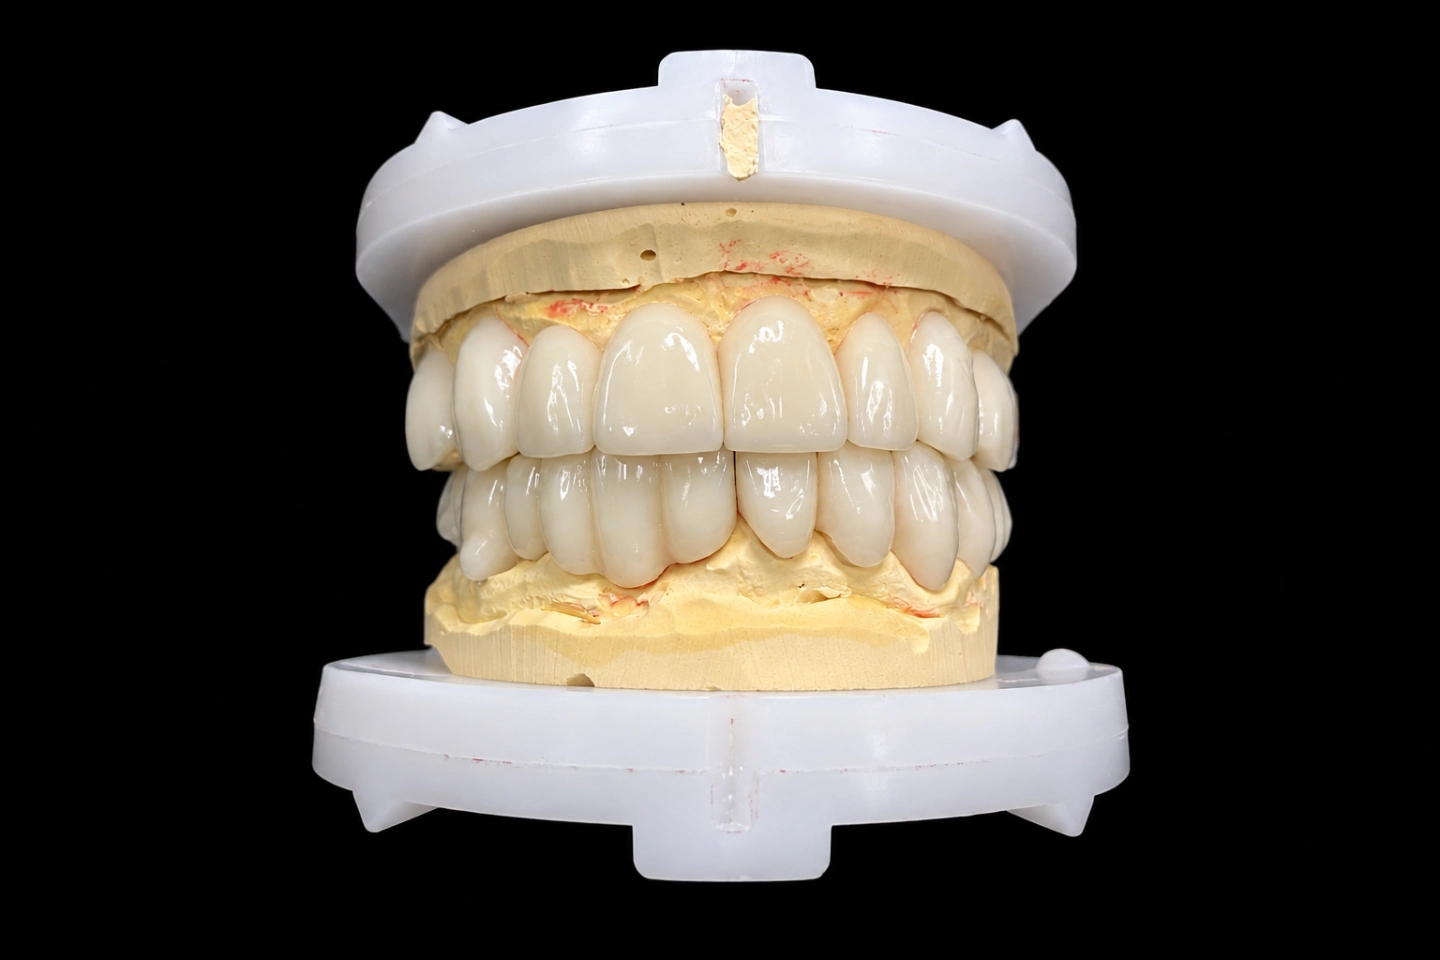
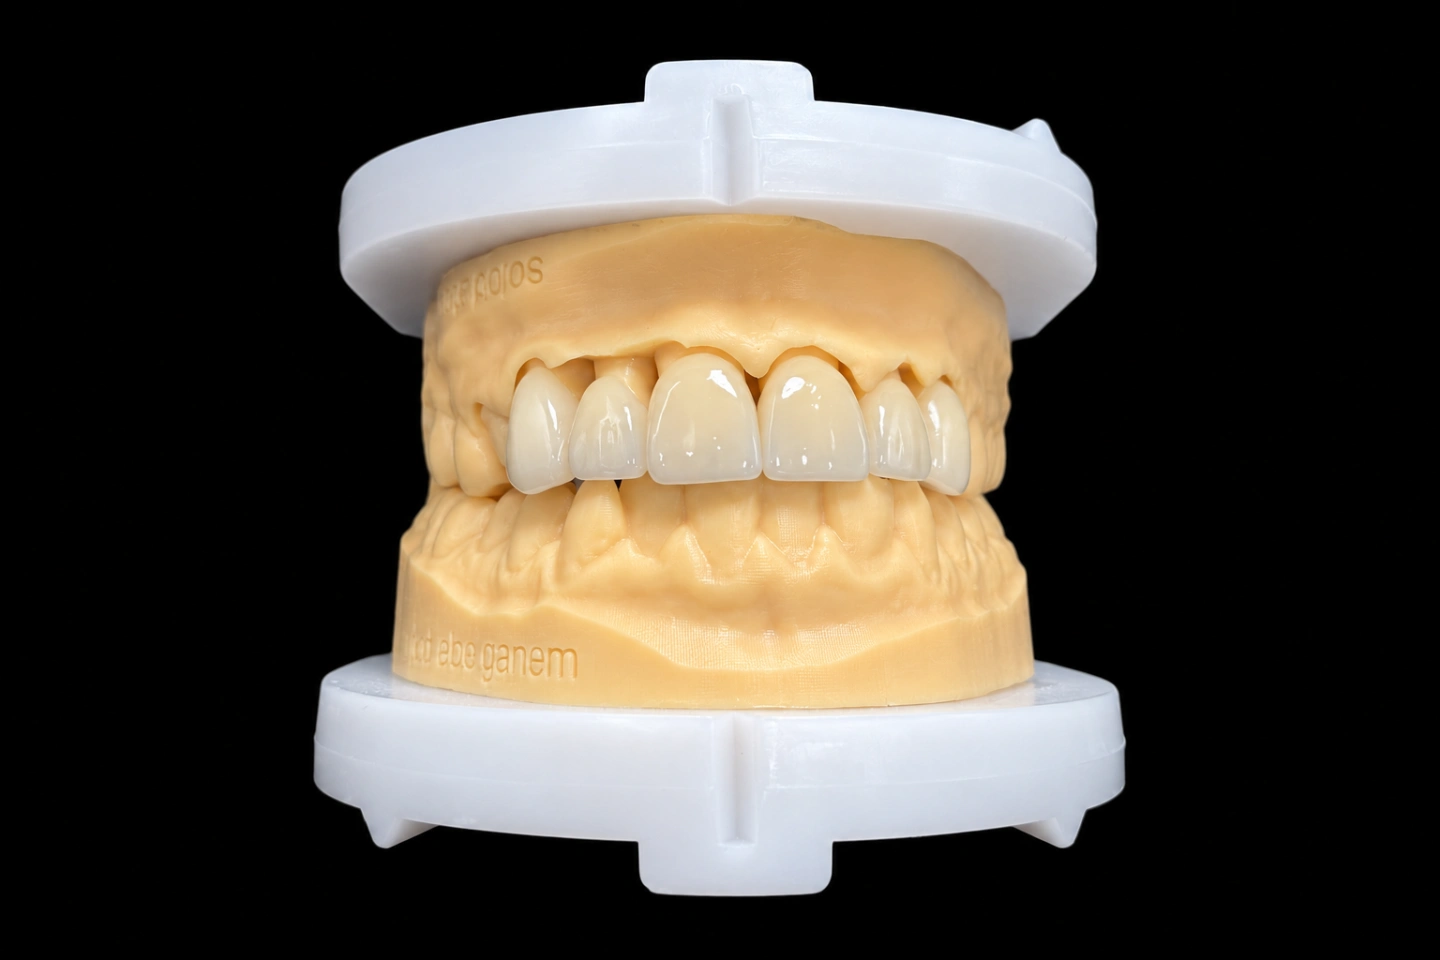
Patient Situation
The patient has stable gums and a medium-high smile line . They’d already whitened, which made the older problems easier to see .
What the Dentist Asked For
On top of that one line, the Rx and WhatsApp notes asked for :
Why Pressed e.max Suited These Natural Looking Veneers
Pressed lithium disilicate gave us one controlled shape across six teeth, and its facial can be cut back and hand-layered where it needs more depth .
The dentist also had long-term numbers to go on. A 2025 review of 29 studies pooled lithium disilicate veneer survival at 96.81% over a mean of 10.4 years, with no significant survival difference between the three ceramics that had long-term data. Survival doesn’t mean nothing ever needs fixing, though, and it’s no forecast for one patient.
Technical Problems Behind These Natural Veneers, and How We Solved Them
One shade across six teeth would stop at the canine
Set all six in A1 and you’ve got a bright block ending in a hard line at #5. Natural teeth don’t work that way. Centrals usually run lighter, and canines carry more color. So we planned tooth by tooth, and the color steps down until the canines land on the premolars’ numbers.
| Teeth | Stump shade | Body | Near the gum | Mid-facial ceramic |
|---|---|---|---|---|
| #8, #9 | ND2 | A1 | A2 | 0.5 mm |
| #7, #10 | ND3 | A1 | A2 | 0.6 mm |
| #6, #11 | ND2 | A2 | A3 | 0.5 mm |
The stumps weren't all the same color
With the composite off, the laterals came in a step darker than the other four teeth . Thin ceramic picks that up. A lab study of 0.6 mm veneers, made in another pressed ceramic, found dentin color mattered while seven resin cement shades barely changed the result. Cement wasn’t going to fix this at the chair. So we used the room the dentist had left to add ceramic on the laterals, and the outer contour didn’t move .
There's not much ceramic to work with near the gum
A review of minimally invasive veneers cites enamel of about 0.3–0.4 mm at the gingival third of incisors. Staying in it has real value: a review of six clinical studies reported about 99% survival on enamel, 91% with severe dentin exposure, and lower success on existing composite.
For us, that left about 0.3 mm of ceramic at the margin on all six . Too thin to layer. We built the warmth there with a fine stain wash .
Translucency had to fade without looking staged
We cut back the incisal third deepest on the centrals, shallower on the laterals, and barely at all on the canines, then layered incisal porcelain into that space . Canines are thick and fairly solid at the tip. Give them a glassy edge, and they stop looking like the tooth next door.
Natural enamel doesn't have a glaze finish
Match the color, and natural looking veneers can still look wrong. A high-gloss canine beside a low-gloss premolar reads as two different things from across a room. Working from close-up photos and the PLY scan, we cut the surface lines first, kept the glaze light, and finished by hand . The mark on #12 went on the work ticket as do-not-copy .
The canine's contour is right where the eye lands
The veneer adds material to the canine, and the premolar gets nothing. In our first design, #6 and #11 sat slightly proud of their neighbors. Neither tooth looked wrong alone, but the dentist spotted the step in the occlusal view and marked it up on the screenshot . We flattened the distal third of both canines, and width and length stayed put . Their palatal and incisal contours came straight from the pre-op scan, so the guidance had no reason to change .
Making the Natural Looking Veneers, Step by Step
Design Goals for the Finished Natural Veneers
The dentist tried in the set before bonding, one at a time and then all together, and sent photos on WhatsApp . Our light box can’t stand in for daylight, so they shot it under the operatory light and again by the window. It went ahead to bonding with no changes, using one neutral resin cement .
| Design goal | How it was checked | Result |
|---|---|---|
| No visible line at #5 and #12 | Standard light at the lab, then both try-in photos | Read as one row |
| Laterals even with their neighbors | Stump-colored dies, then try-in | No visible difference |
| Fading translucency | Backlit in tooth order | Visible from central to canine |
| Surface like the premolars | Photos at the same angle | No changes asked for |
| Straight facial plane | Occlusal view | Confirmed after the revision |
| Lengths per the Rx | Measured in the design and on the model | On target |
| Guidance kept | Lateral movement on the model | No palatal adjustment at try-in |
| Recall |
The patient’s take: brighter front teeth that don’t look like a separate set .
Time does work against natural veneers like these. Ceramic holds its color better than enamel, and enamel keeps changing with coffee, wine and age. So the dentist warned the patient the premolars could drift, and planned to recheck them at recall .
What to Send Us for Natural Looking Veneers
Natural veneers generally take 5–7 working days in our lab. Design approval on front-tooth esthetic veneers adds 1–2 days.
Who Made It
This set of natural veneers went through our CAD design team (about 100 people), our ceramic and metal department (about 70) and a separate QC team of about 25. They work inside Istar Digital Dental Lab’s four labs in Shenzhen and Huizhou, China. We’ve been running since 2012, with about 460 staff and no outsourcing.
Istar Digital Dental Lab is an FDA-registered establishment (Registration Number 3039441248), which you can look up in the FDA establishment registration database. Our labs run an ISO 13485 quality management system.
Natural Veneers FAQ
Do you accept physical impressions for natural veneers?
Yes. Send VPS impressions of the prep and opposing arch, with a VPS bite registration. Wax bites can soften and distort in transit, so please skip them.
Can natural looking veneers start with a mock-up?
Sure. We can make a diagnostic wax-up or mock-up first. A sketch, an old restoration photo or a provisional works as a reference too, and we can copy a provisional’s function.
What other veneer materials do you make?
Zirconia, which is stronger and more wear-resistant, and lab-made composite. Compare them with pressed e.max veneers and see what our e.max lab makes.
Can I change a natural veneers design after approving it?
Yes. Tell us early, and it won’t affect the lead time or the fee.
How do I repolish e.max after a chairside adjustment?
Adjusting removes the glaze layer, so polish it back with a fine ceramic system such as 3M Sof-Lex.
Can you save my preferences for future cases?
Yes. We keep each dentist’s preferred contacts, bite, shape and color on file. Group practices can keep separate notes for each dentist.
What if I ask for a design you think is risky?
We’ll tell you what worries us and ask what you want to do. Want a change? We’ll make it. Stick with the original, and we’ll make it to the Rx with no sign-off form, but a remake caused by that design isn’t on us.
What's free to redo, and what isn't?
Open margins, open contacts, high bite, a veneer that won’t seat, inaccurate color, visible flaws and poor shape are ours to fix for free. Changing the shade or material afterward isn’t free, and neither is a case you asked us to try on an impression we’d already flagged as poor.
What about warranty and shipping?
Veneers carry our 3-year warranty. You pay to send a case in, and we pay to ship finished work back, remakes included.
Can you rush a set of natural veneers?
Rush service is free for clients who send us 10 or more cases a month. We guarantee the ship date, but not the arrival date, because customs times vary.
How is pricing handled?
We don’t publish prices on the website. Ask for our price list, and we’ll quote each case item by item to your requirements. Ongoing partnerships suit clinics with a regular case flow.
Send Us Your Next Natural Veneers Case
Got a partial set that has to disappear next to real teeth? Single trial cases are welcome, or come see the work for yourself on a factory visit or video tour.